

I've had a few questions regarding these spinner bushings, so thought it might be easier to write a guide for you guys

Instructions to fit the Brandon
Navarro Arkanoid bushings
Each Arkanoid
spinner has 2 bushings that hold the main spinner knob shaft in place. One
bushing is on the top of the housing just beneath the knob, the other is
situated on a removable bracket plate upside-down near all the gears.
The bushings
tend to wear in pairs, so it’s advisable to replace both of them together when
they are worn out.
These
bushings are made of metal with a Teflon coating and have been specifically
designed to fit an original Taito 4 gear spinner unit. They may fit the 2 gear
unit or other branded spinner units but I cannot guarantee this and the
following fitting instructions are written for the Taito 4 gear spinners.
It should be
a fairly easy task to fit these and you do not need to remove the spinner knob
from the shaft! Follow the instructions below:-
1. I recommend
you taking a few photos of the spinner assembly before dismantling it. Even
though it’s pretty easy to put back together again, a few pictures will help in
aiding where everything goes back in the right position.
2. Remove the
2 screws and lift off the encoder pcb and place to one side. You do not need to
remove the “L” shaped pcb holder bracket, you can keep it connected.
3. Remove the
4 screws at the bottom of the spinner to the metal plate that holds the encoder
wheel. You do not need to remove the encoder wheel or the attached gear and pin
assembly. Remove screws, lift the metal plate out with everything attached and
place safely to one side.
4. Lift out
the middle gear assembly and place to one side.
5. There
should be a small nut holding the shaft gear cog onto the shaft, remove this using
a pair of pliers or small spanner and lift off the cog. There might also be a
small shake-proof washer on top of the cog. Place the cog, nut and (if present)
washer to one side.
6. Remove the
circular clip that holds the shaft in place. Place clip to one side.
7. The knob shaft
should now lift out completely. Be careful that there may also be a flat washer
between the top bushing and spinner knob, if there is place to one side.
8. If your
spinner is still mounted onto a control panel, now is a good time to remove the
4 mounting bolts so you can remove the spinner from the panel and work on the
unit more easily.
9. Remove the
4 screws (2 on each side of the spinner housing bracket) that holds the bottom
bushing plate in place and lift the plate out.
10. With
everything now disassembled, you should easily be able to push out the old
plastic bushings from their holes (assuming you’ve still got a bushing left and
it’s not already completely disintegrated!). The removed parts should look like
this below:-
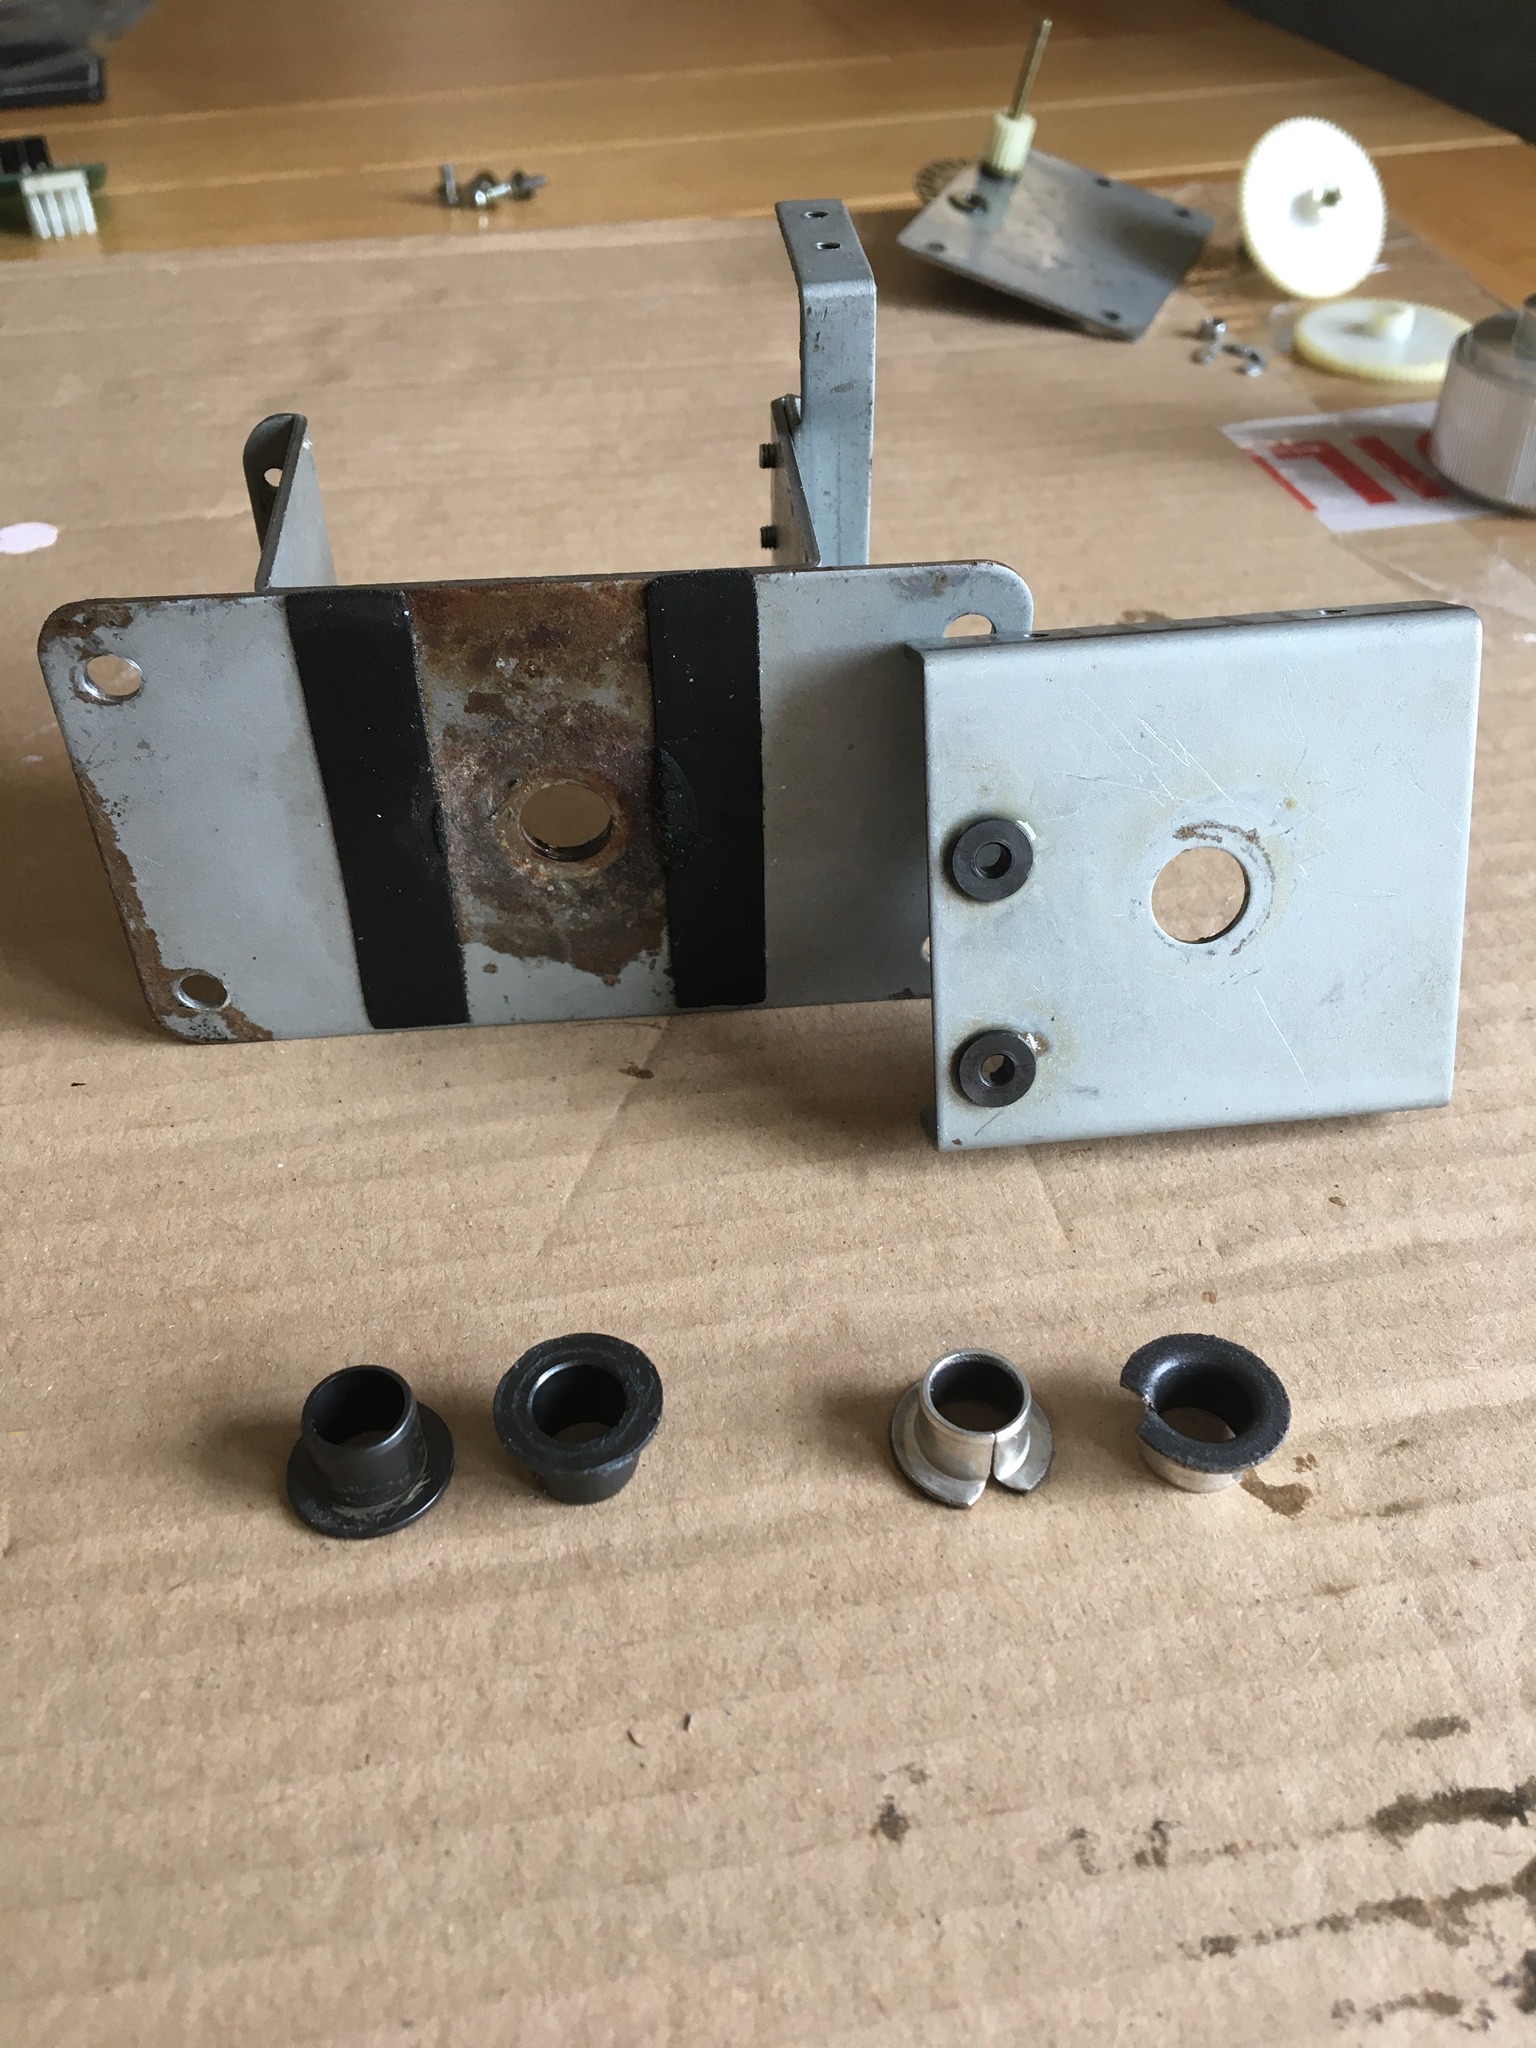
The old
bushings on the left are the old ones that have been removed. They might
actually look fine but they are in-fact quite worn and have too much play in
them so they need replacing.
11. Now is a
good time to give the whole unit a refurb. Firstly, check the shaft for
wear/rust or anything else that might prevent it running smoothly. I cleaned
mine using wire wool and WD40. Brandon informed me that he polished his shaft
from 400 grit to 3000 grit then used a compound and wax on his. I personally
found that for my two units, wire wool and a light lubricant worked just as
well. Secondly, check the top of the spinner housing just under the knob, this
is where liquids were often split on the control panel and dripped through onto
the top of the spinner housing and you’ll often find rust. Clean off the rust.
Again, I used wire wool and WD40 but other methods like white vinegar should
work just as well. Thirdly, give all the plastic gears a good clean up too if
they need it. A bit of lubricant on these will stop any nasty burring sound and
make it run silky smooth.
12. Fit the 2
new bushings in the holes. These are really tight to get in so it’s highly
unlikely you’ll be able to simply push them in, they will need a bit of ‘persuading’
to get in. Even though it might sound like the perfect tool to use, don’t use a
rubber mallet to directly try and knock it in the hole, you’ll probably end up
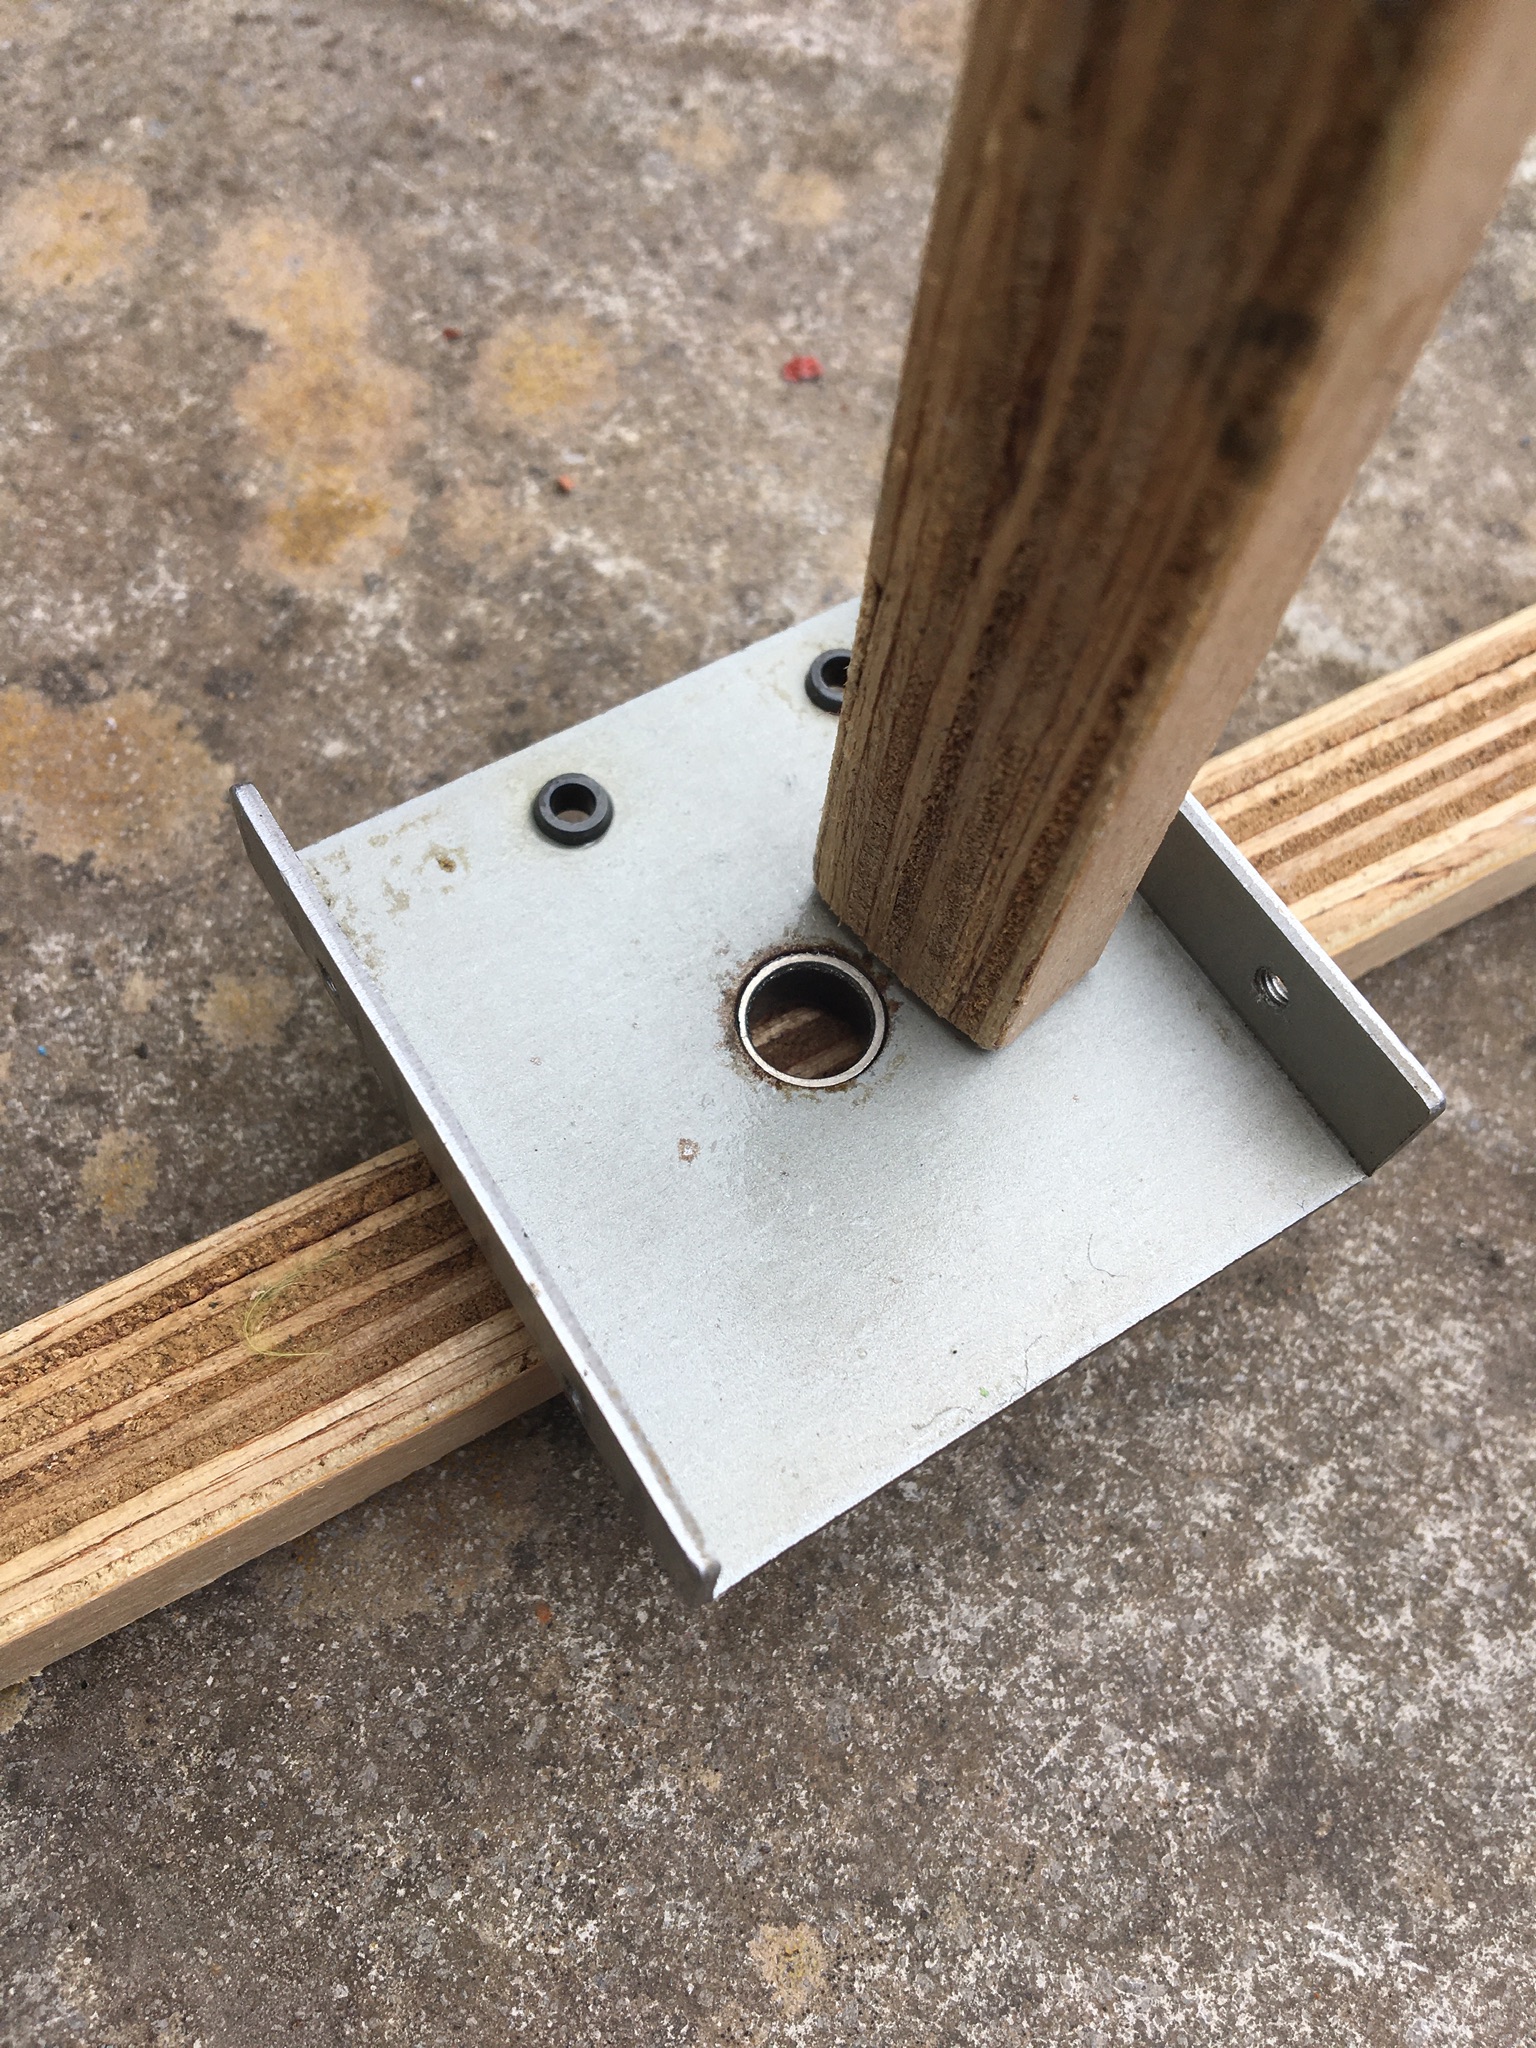
bending your metal bracket! My tip is to push the bushing into the hole as far
as you can using your fingers (which won’t be very far!), then turn the whole
the bracket upside-down and lay it on a piece of scrap wood. Tap around the
side of the hole using another piece of scrap wood (to stop it damaging or
denting the bracket or bushing), the bushing should then slide in the hole
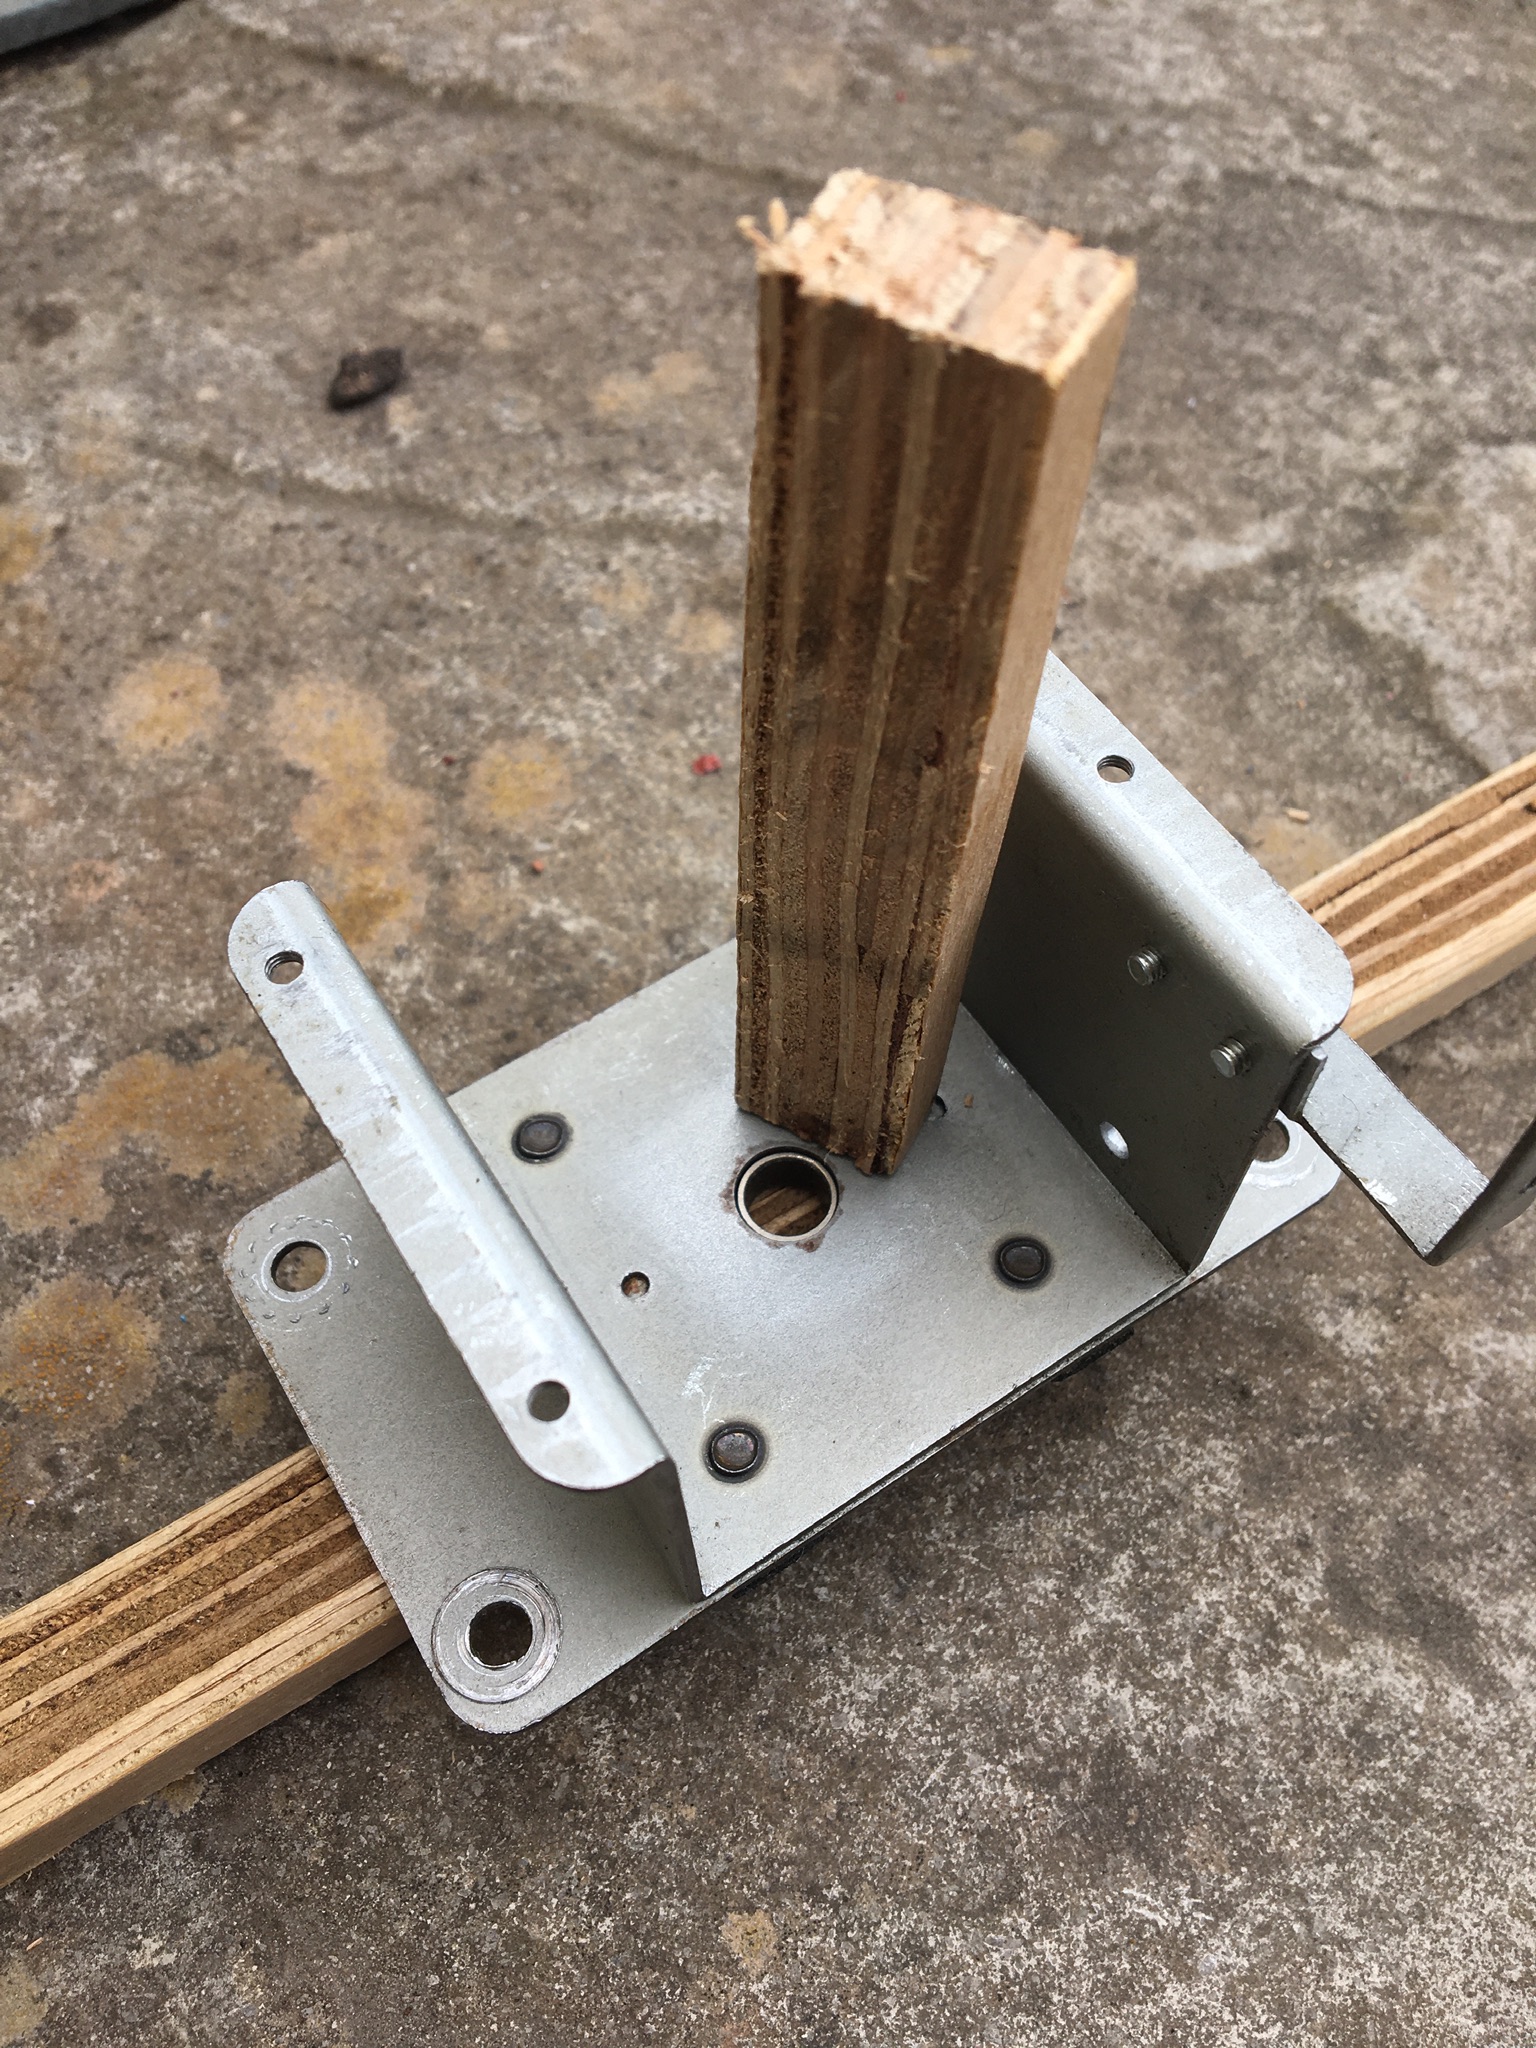
easily. Do this method to push in the bushings into both brackets. See pictures
below to explain what I mean:-
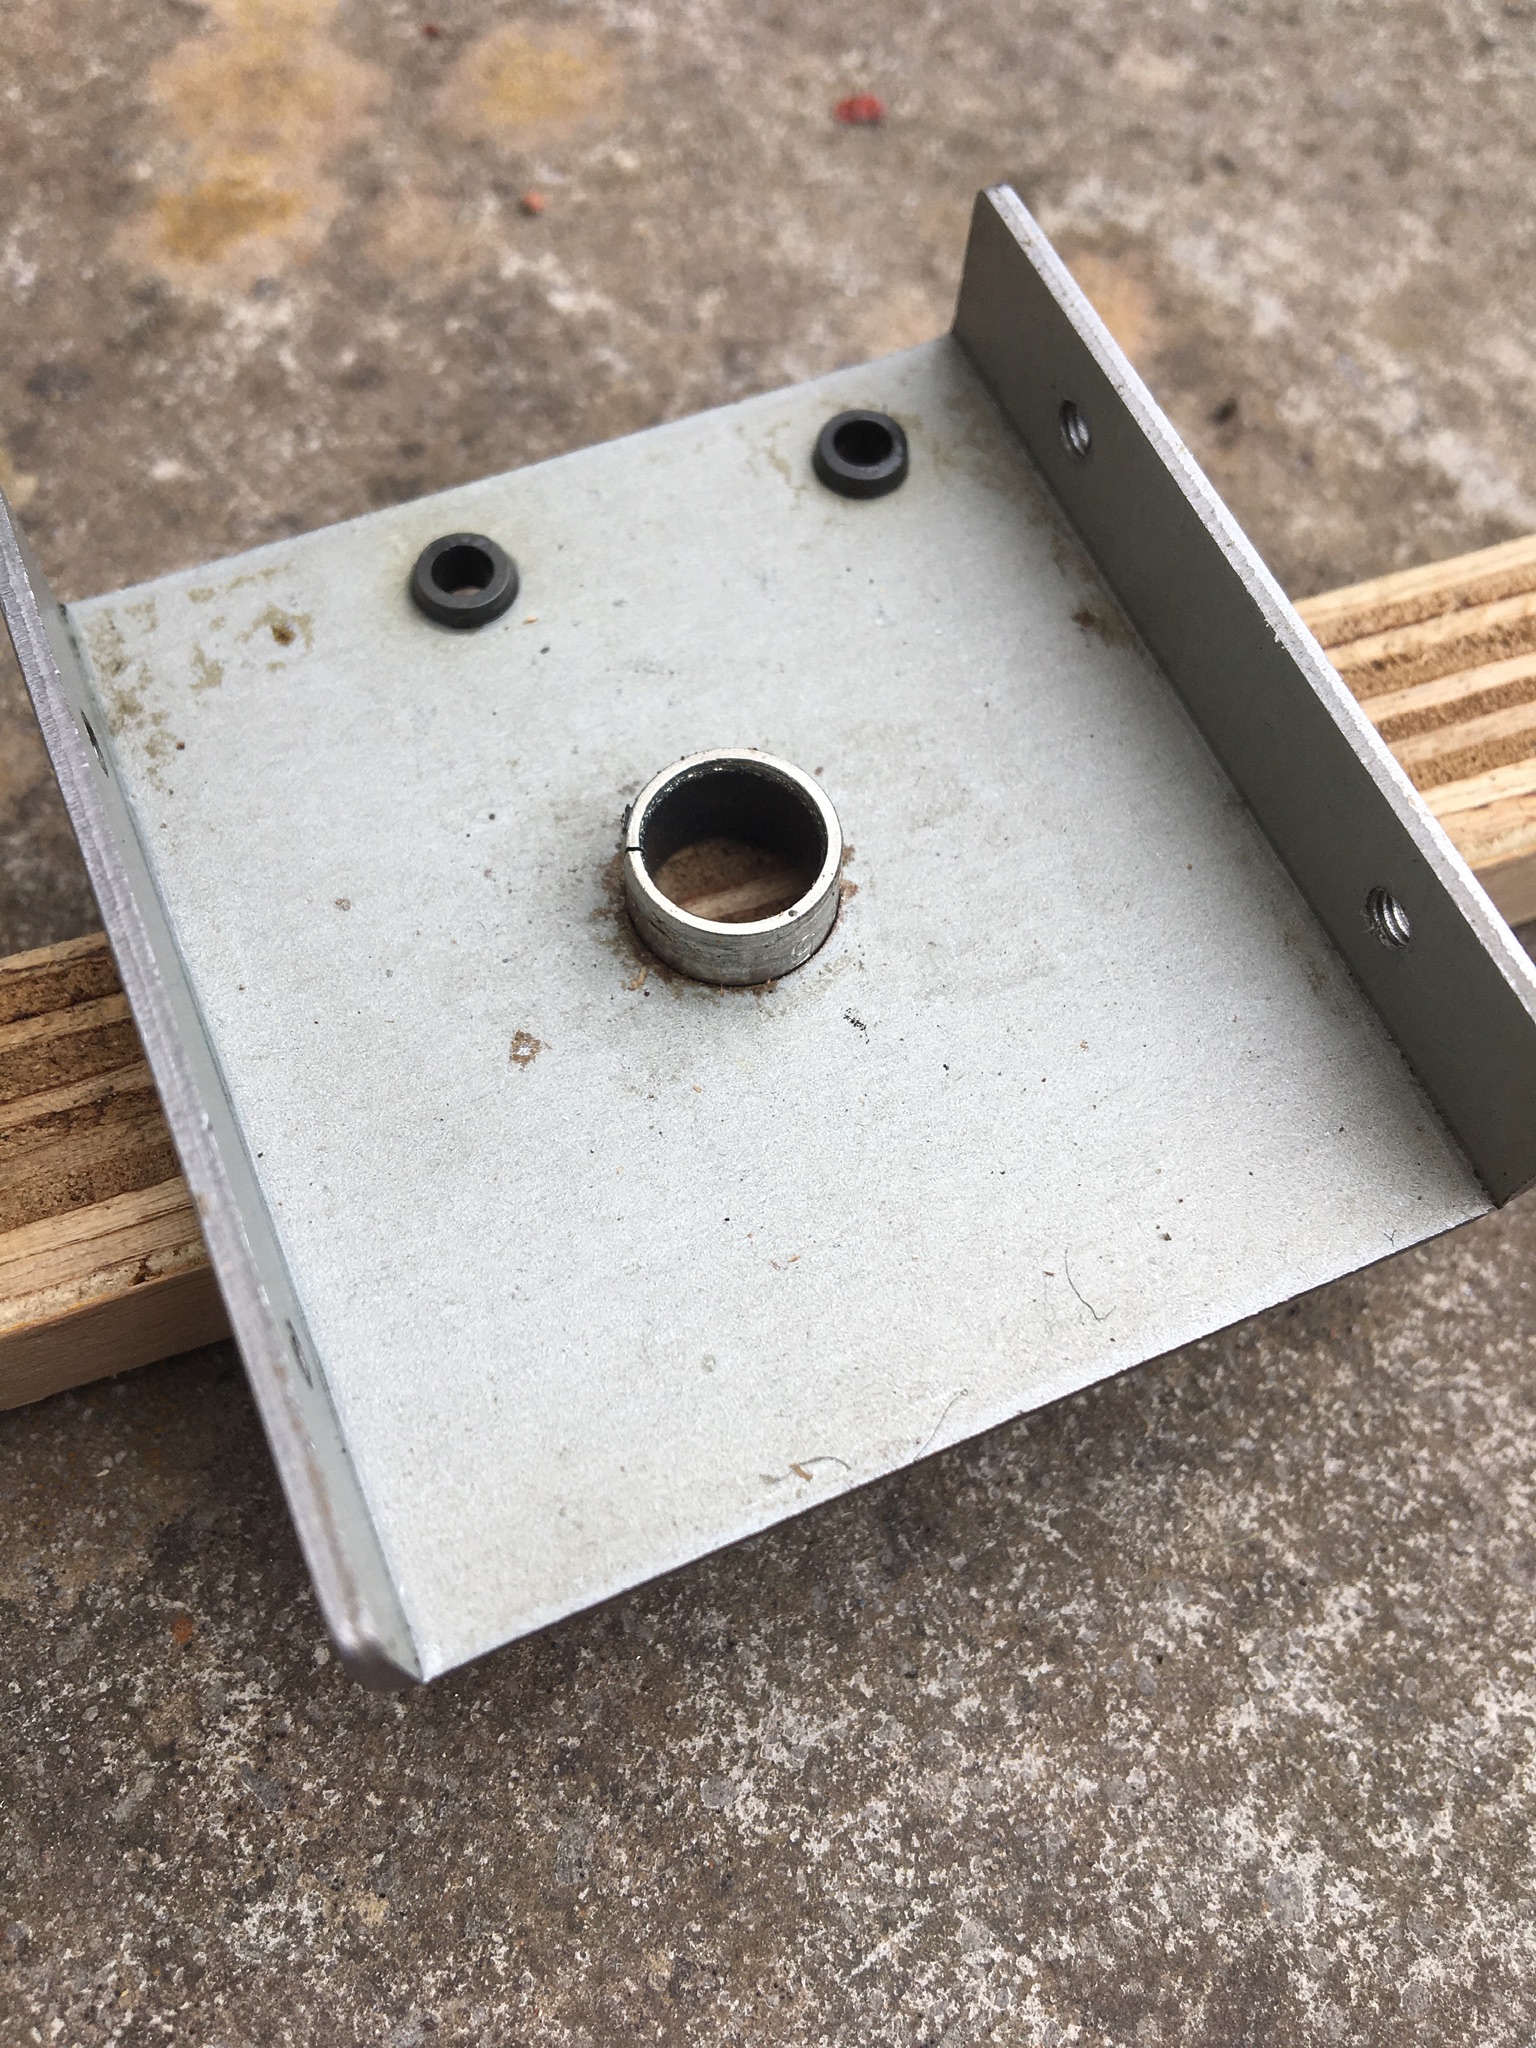
Bushing now
fully inserted into hole:-
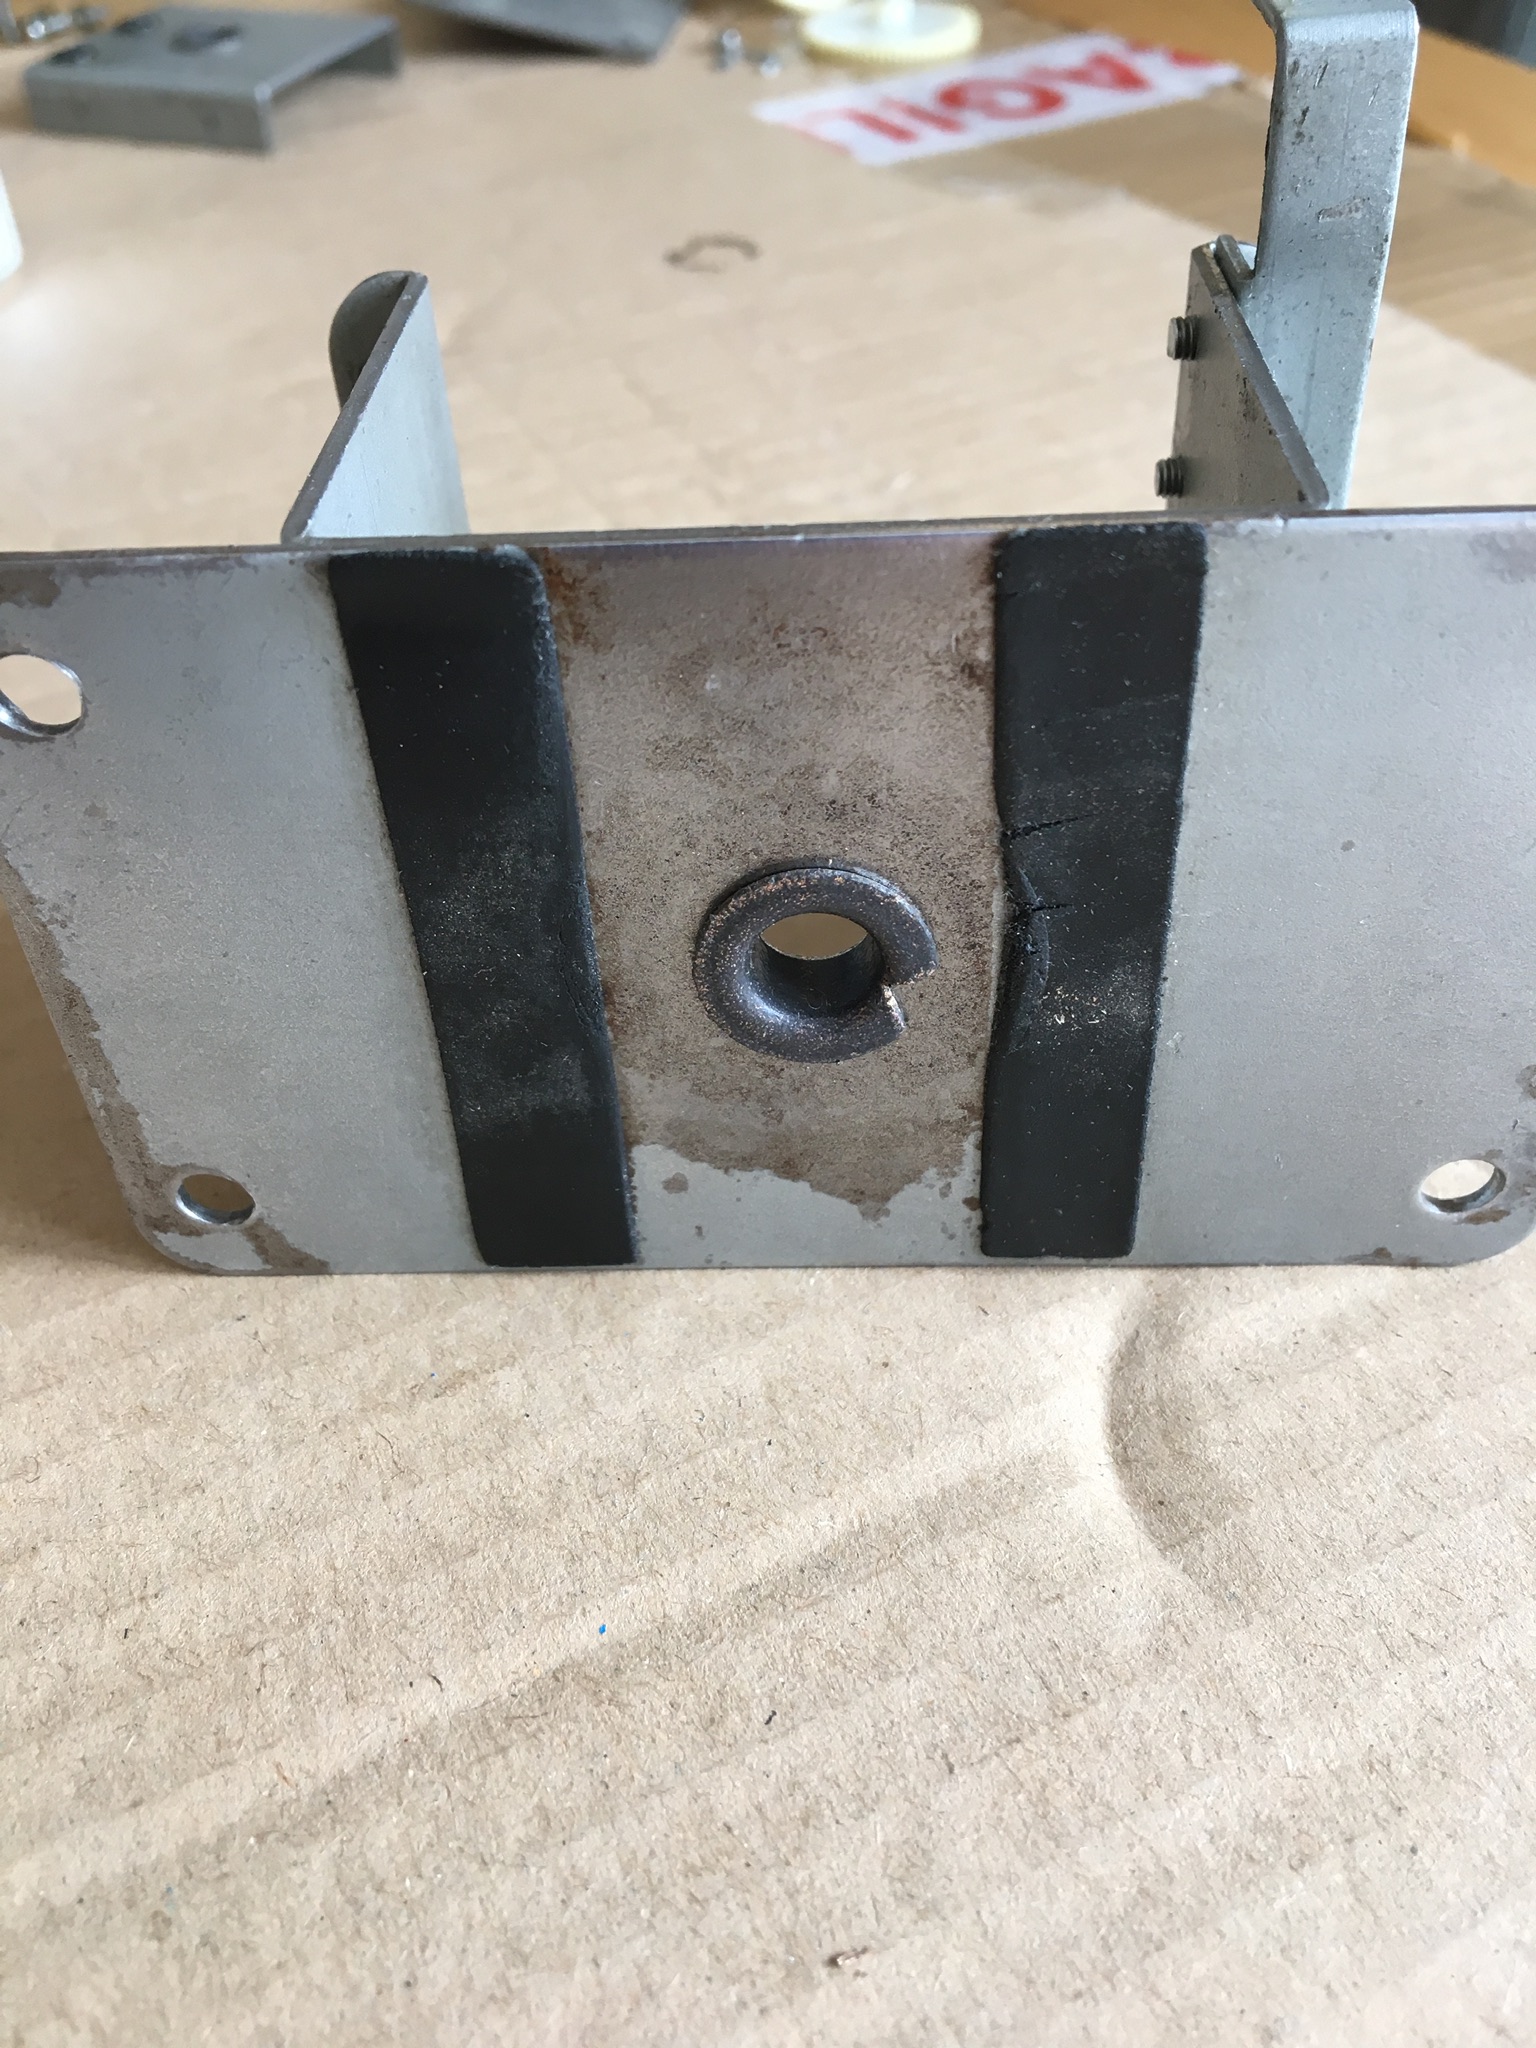
13. Now re-fit
the bottom bushing plate to the main housing using the 4 screws. Do not fully
tighten the 4 screws at this time as you need to ‘fine tune’ the tension to the
spinner shaft.
14. I suggest
adding a bit of light lubricant to both of the new bushings and the spinner
shaft (I use “Carpilube” which is a lubricant used for Slush Puppie machines
and is food safe, but works perfectly well for arcade stuff too!). Insert the
knob spinner shaft into the new bushings (but do not add fit the circular clip
to hold it in place just yet) to test how well it spins. Start tightening the 4
bottom plate screws whilst regularly spinning the shaft to adjust the feel of
the spin. By tightening the 4 screws it moves the bottom base plate very
slightly and the two bushings need to be central to each other so the shaft can
spin true. You might have to play around with the tightening of the 4 screws to
get your preferred “feel” especially if your shaft has a bit of wear. I’ve
found if you tighten all 4 screws to the max the spinner works fine but is a
bit stiff so the best option for me was to slacken the screws slightly to get
the perfect spin.
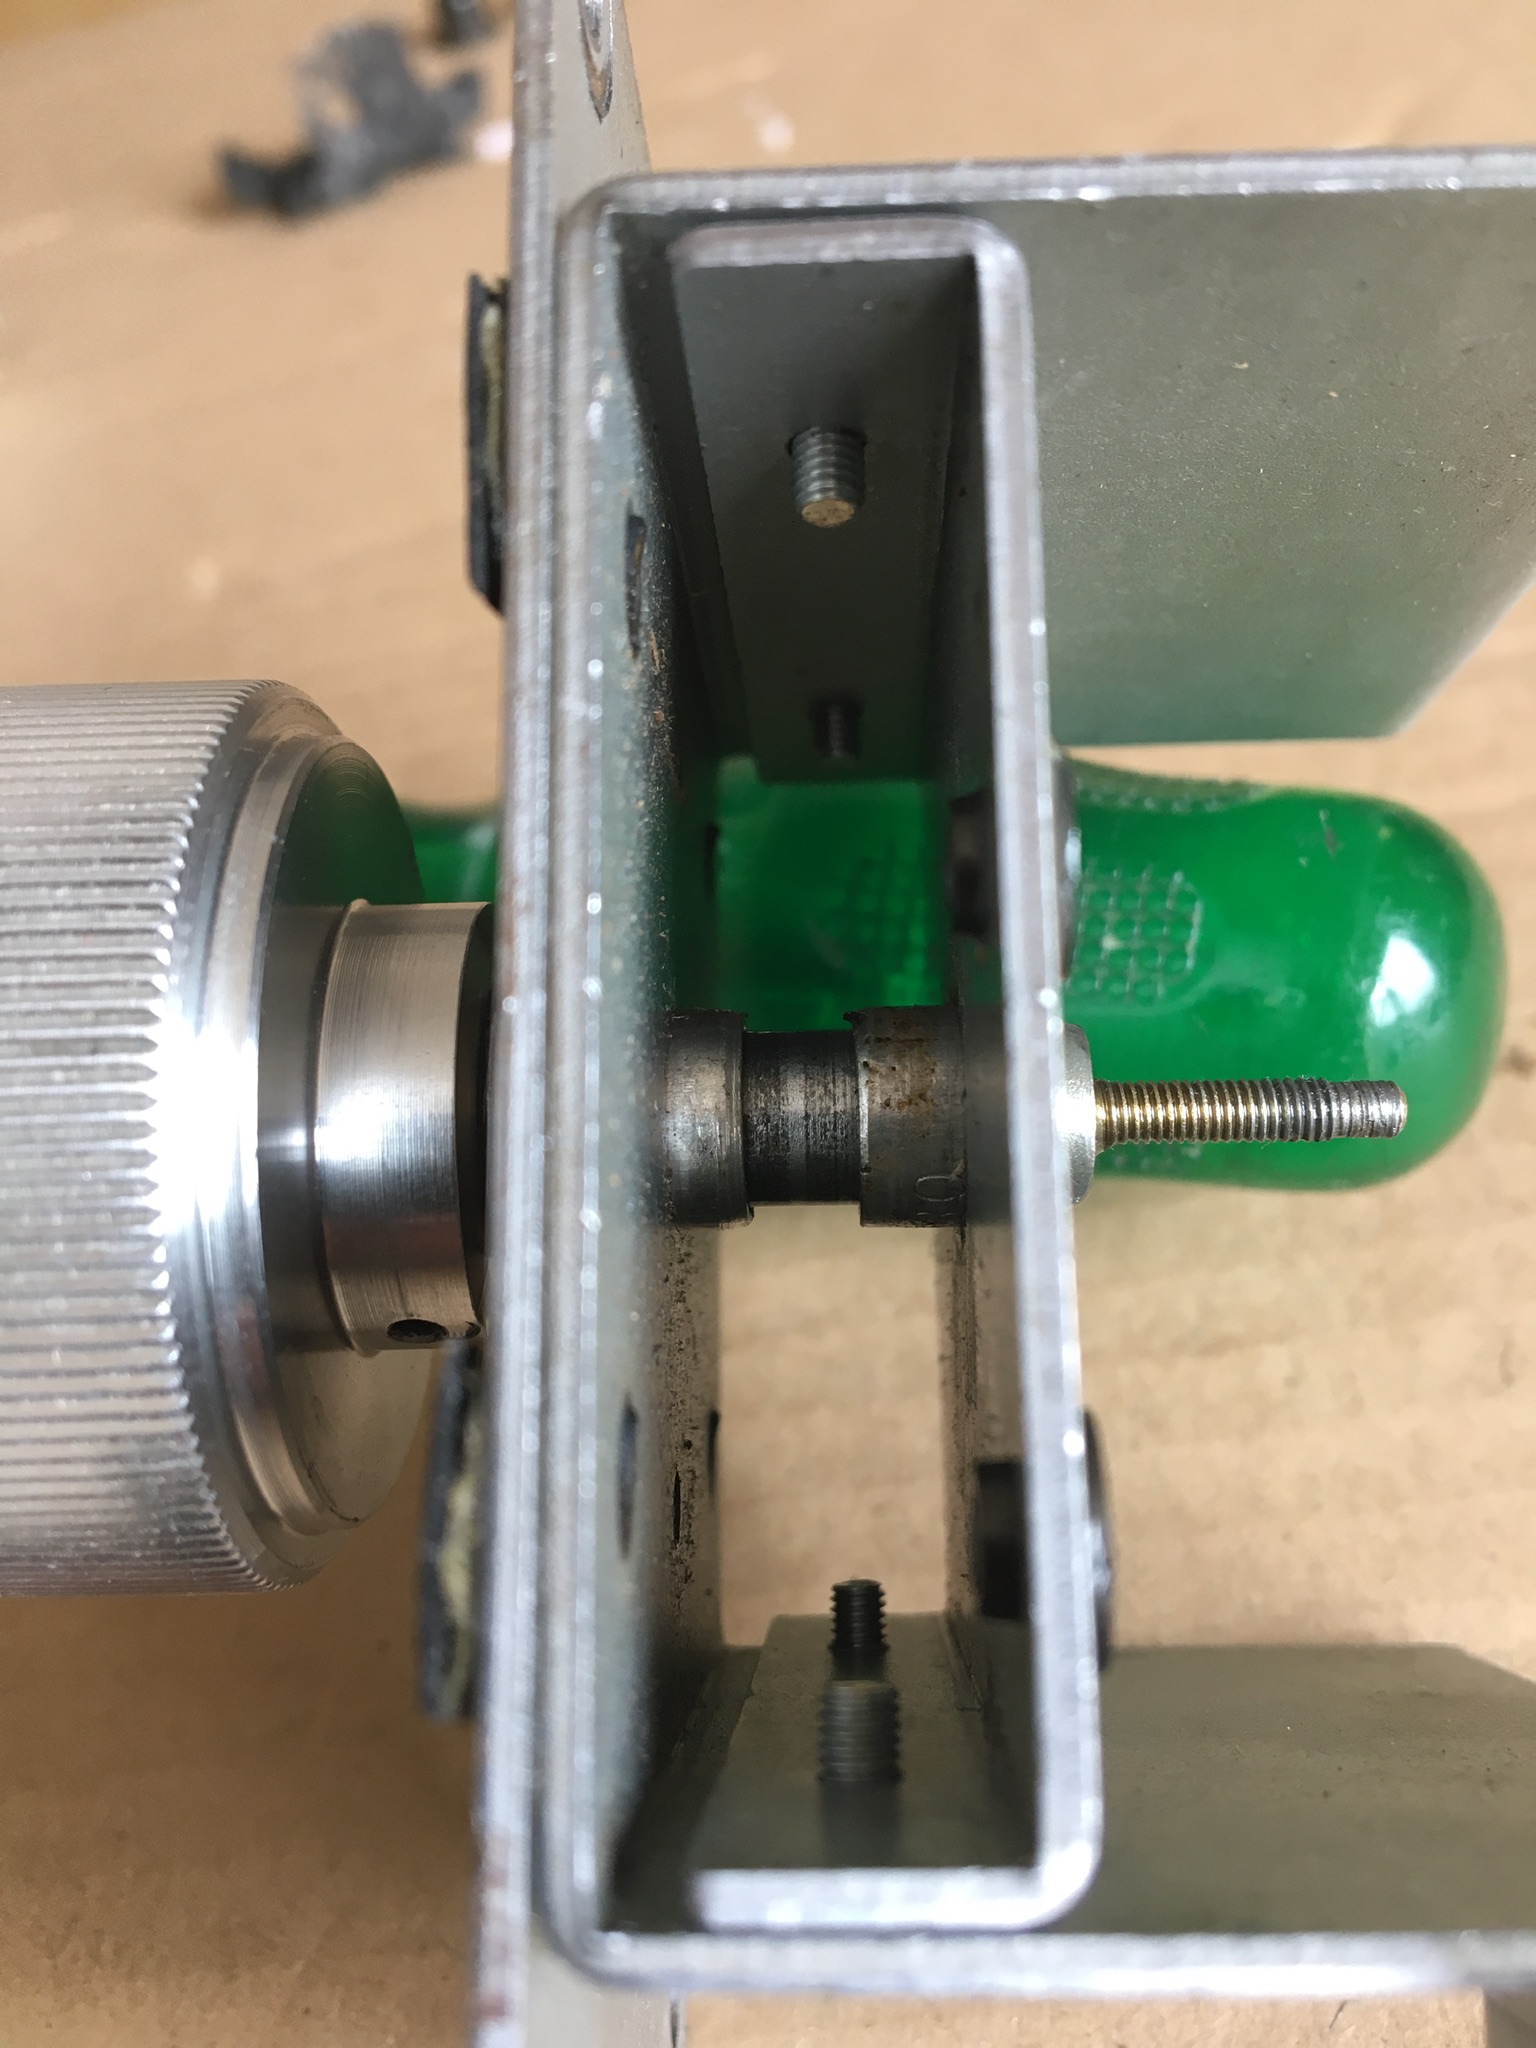
15. Once
happy with the spin, refit the spinner housing back onto your control panel (if
applicable) and refit the circular shaft clip and test the spin again to check
everything is still spinning smoothly.
16.
Re-assemble the rest of the unit in the reverse order you took it apart. Make sure
you lubricate the gear cogs and smaller cog pin bushings to eliminate or reduce
the “burr” sound when spinning the unit. Again, I used the Carpilube for the gears. I lubed one of my spinners with this 2 years ago and it was still running sweet so didn't need to do it again.
17. Connect
the spinner up to your game and give it a good test!
Instructions to fit the Brandon
Navarro Arkanoid bushings
Each Arkanoid
spinner has 2 bushings that hold the main spinner knob shaft in place. One
bushing is on the top of the housing just beneath the knob, the other is
situated on a removable bracket plate upside-down near all the gears.
The bushings
tend to wear in pairs, so it’s advisable to replace both of them together when
they are worn out.
These
bushings are made of metal with a Teflon coating and have been specifically
designed to fit an original Taito 4 gear spinner unit. They may fit the 2 gear
unit or other branded spinner units but I cannot guarantee this and the
following fitting instructions are written for the Taito 4 gear spinners.
It should be
a fairly easy task to fit these and you do not need to remove the spinner knob
from the shaft! Follow the instructions below:-
1. I recommend
you taking a few photos of the spinner assembly before dismantling it. Even
though it’s pretty easy to put back together again, a few pictures will help in
aiding where everything goes back in the right position.
2. Remove the
2 screws and lift off the encoder pcb and place to one side. You do not need to
remove the “L” shaped pcb holder bracket, you can keep it connected.
3. Remove the
4 screws at the bottom of the spinner to the metal plate that holds the encoder
wheel. You do not need to remove the encoder wheel or the attached gear and pin
assembly. Remove screws, lift the metal plate out with everything attached and
place safely to one side.
4. Lift out
the middle gear assembly and place to one side.
5. There
should be a small nut holding the shaft gear cog onto the shaft, remove this using
a pair of pliers or small spanner and lift off the cog. There might also be a
small shake-proof washer on top of the cog. Place the cog, nut and (if present)
washer to one side.
6. Remove the
circular clip that holds the shaft in place. Place clip to one side.
7. The knob shaft
should now lift out completely. Be careful that there may also be a flat washer
between the top bushing and spinner knob, if there is place to one side.
8. If your
spinner is still mounted onto a control panel, now is a good time to remove the
4 mounting bolts so you can remove the spinner from the panel and work on the
unit more easily.
9. Remove the
4 screws (2 on each side of the spinner housing bracket) that holds the bottom
bushing plate in place and lift the plate out.
10. With
everything now disassembled, you should easily be able to push out the old
plastic bushings from their holes (assuming you’ve still got a bushing left and
it’s not already completely disintegrated!). The removed parts should look like
this below:-
The old
bushings on the left are the old ones that have been removed. They might
actually look fine but they are in-fact quite worn and have too much play in
them so they need replacing.
11. Now is a
good time to give the whole unit a refurb. Firstly, check the shaft for
wear/rust or anything else that might prevent it running smoothly. I cleaned
mine using wire wool and WD40. Brandon informed me that he polished his shaft
from 400 grit to 3000 grit then used a compound and wax on his. I personally
found that for my two units, wire wool and a light lubricant worked just as
well. Secondly, check the top of the spinner housing just under the knob, this
is where liquids were often split on the control panel and dripped through onto
the top of the spinner housing and you’ll often find rust. Clean off the rust.
Again, I used wire wool and WD40 but other methods like white vinegar should
work just as well. Thirdly, give all the plastic gears a good clean up too if
they need it. A bit of lubricant on these will stop any nasty burring sound and
make it run silky smooth.
12. Fit the 2
new bushings in the holes. These are really tight to get in so it’s highly
unlikely you’ll be able to simply push them in, they will need a bit of ‘persuading’
to get in. Even though it might sound like the perfect tool to use, don’t use a
rubber mallet to directly try and knock it in the hole, you’ll probably end up
bending your metal bracket! My tip is to push the bushing into the hole as far
as you can using your fingers (which won’t be very far!), then turn the whole
the bracket upside-down and lay it on a piece of scrap wood. Tap around the
side of the hole using another piece of scrap wood (to stop it damaging or
denting the bracket or bushing), the bushing should then slide in the hole
easily. Do this method to push in the bushings into both brackets. See pictures
below to explain what I mean:-
Bushing now
fully inserted into hole:-
13. Now re-fit
the bottom bushing plate to the main housing using the 4 screws. Do not fully
tighten the 4 screws at this time as you need to ‘fine tune’ the tension to the
spinner shaft.
14. I suggest
adding a bit of light lubricant to both of the new bushings and the spinner
shaft (I use “Carpilube” which is a lubricant used for Slush Puppie machines
and is food safe, but works perfectly well for arcade stuff too!). Insert the
knob spinner shaft into the new bushings (but do not add fit the circular clip
to hold it in place just yet) to test how well it spins. Start tightening the 4
bottom plate screws whilst regularly spinning the shaft to adjust the feel of
the spin. By tightening the 4 screws it moves the bottom base plate very
slightly and the two bushings need to be central to each other so the shaft can
spin true. You might have to play around with the tightening of the 4 screws to
get your preferred “feel” especially if your shaft has a bit of wear. I’ve
found if you tighten all 4 screws to the max the spinner works fine but is a
bit stiff so the best option for me was to slacken the screws slightly to get
the perfect spin.
15. Once
happy with the spin, refit the spinner housing back onto your control panel (if
applicable) and refit the circular shaft clip and test the spin again to check
everything is still spinning smoothly.
16.
Re-assemble the rest of the unit in the reverse order you took it apart. Make sure
you lubricate the gear cogs and smaller cog pin bushings to eliminate or reduce
the “burr” sound when spinning the unit. Again, I used the Carpilube for the gears. I lubed one of my spinners with this 2 years ago and it was still running sweet so didn't need to do it again.
17. Connect
the spinner up to your game and give it a good test!

 Thanks! It definitely deserves an upvote on your post