I mentioned this in another thread so I thought i'd post it too, I made this last year and it's currently packed away in a flight case like most of my stuff

I know others have done similar to this around the world so after I bought my first raspberri pi I wanted to do something 'special' with it and not just put it in a normal Pi case.
I do have a few other Pi's now (the older model B) running Nes/Megadrive games etc. with retro look alike usb controllers but that's another story... and the same type as that is also in my 'Weenix' cab, this one is the model B+ Quad core one with the gig of ram that runs Playstation games in Emulation Station via Retropie just fine,
anyway onwards...
So I had a look in the attic for a donor Playstation and had a choice of 7...
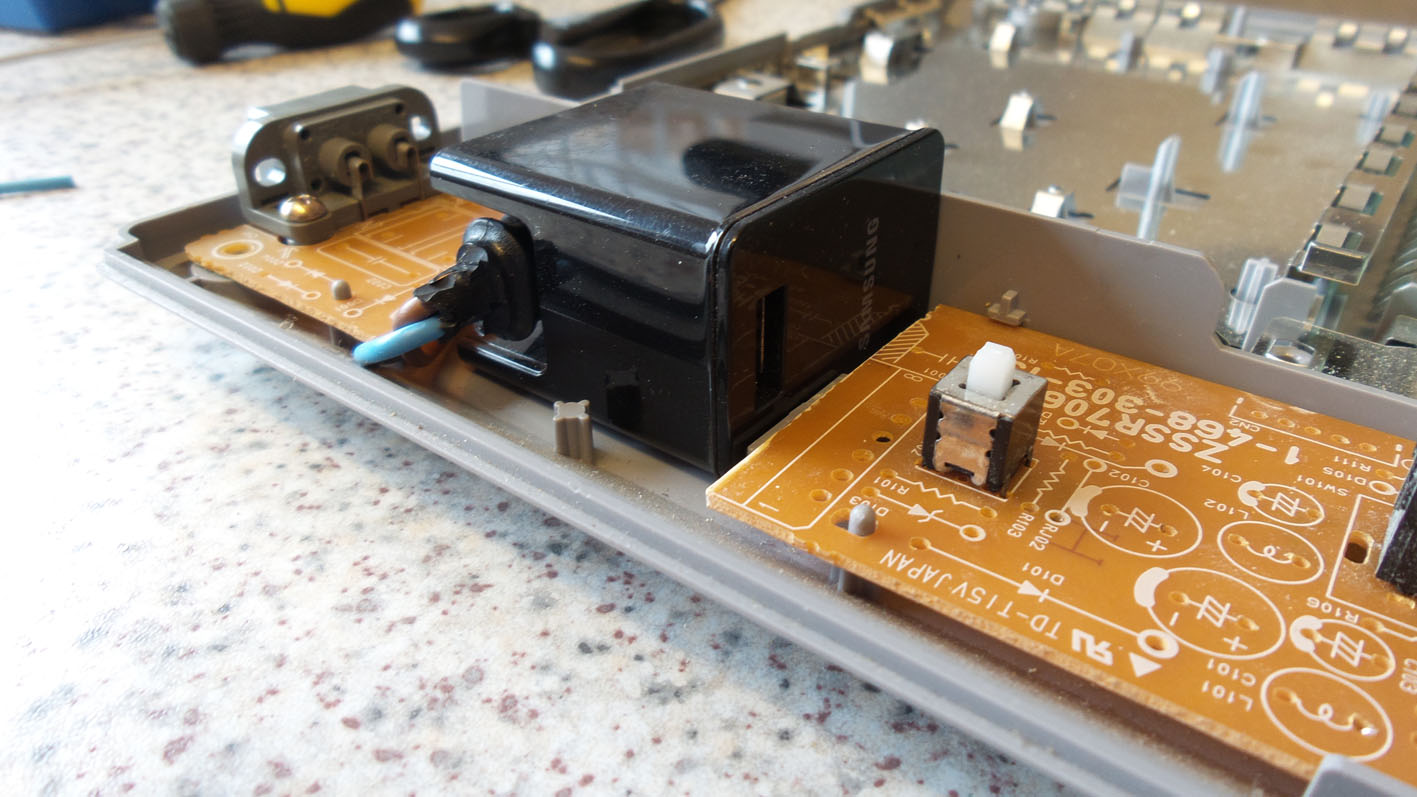
, so chose the last version they did without all the ports on the back (had a few of those anyway). I took everything out and saved them for spares besides the power board which I de-soldered all the components from except the figure 8 socket, reset switch and power switch.
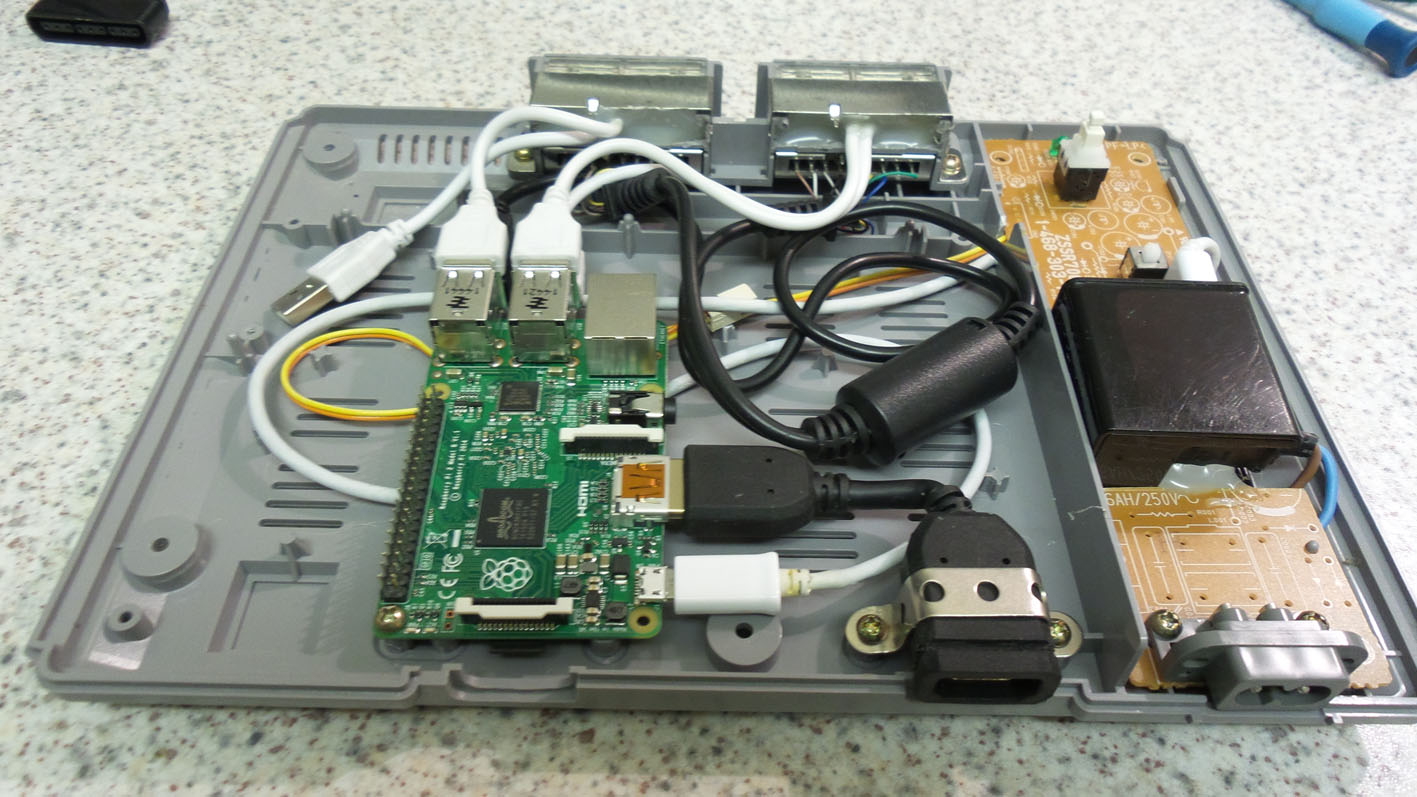
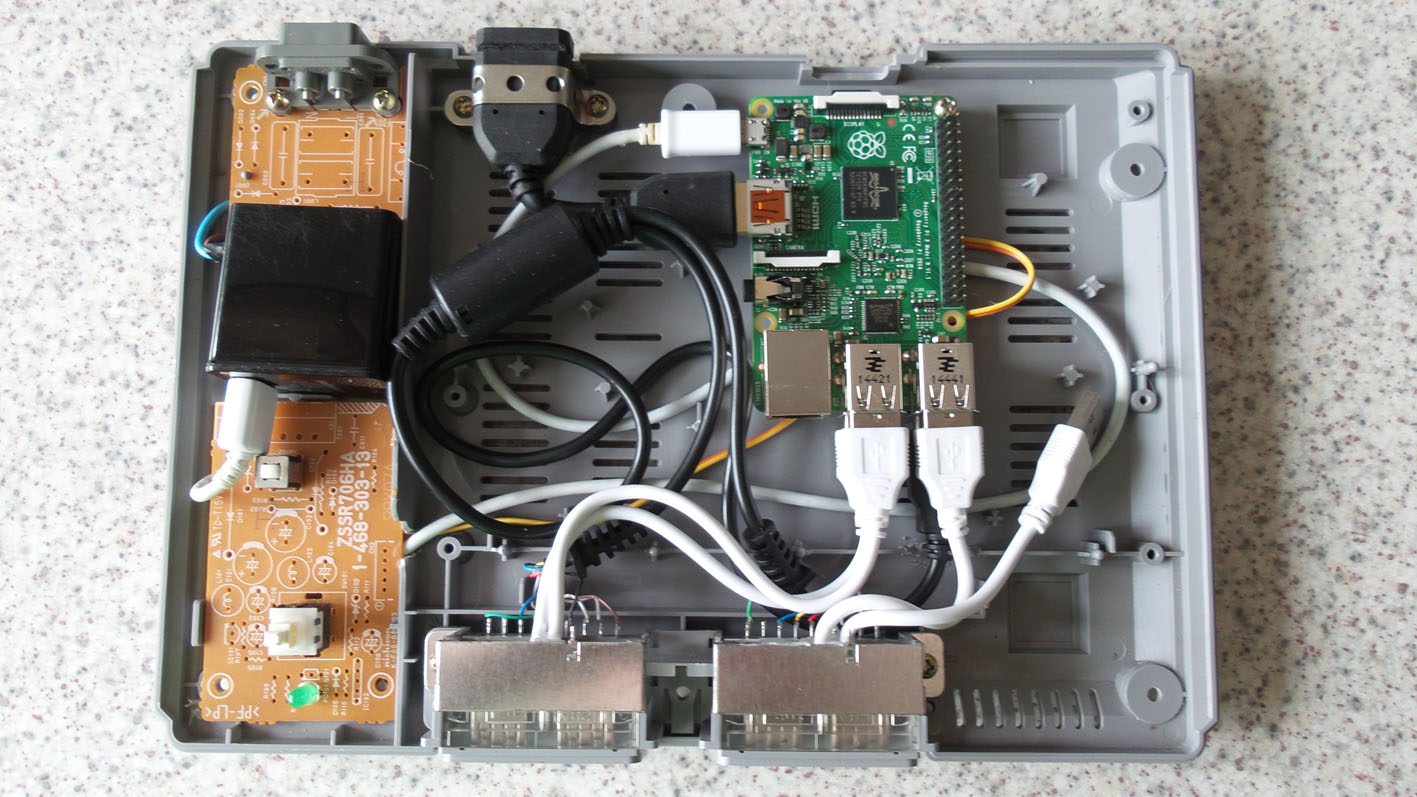
The power supply I used is from a Samsung tablet as it has a figure 8 input on it an can be mounted inside neatly, I had to cut a section out of the power board for this but the fit was great afterwards.
I cut the end from a figure 8 lead and stripped back the casing so I could solder this to the boards original figure 8 socket and then plug into the socket on the power supply mounted inside then from the outside you couldn't see a difference.
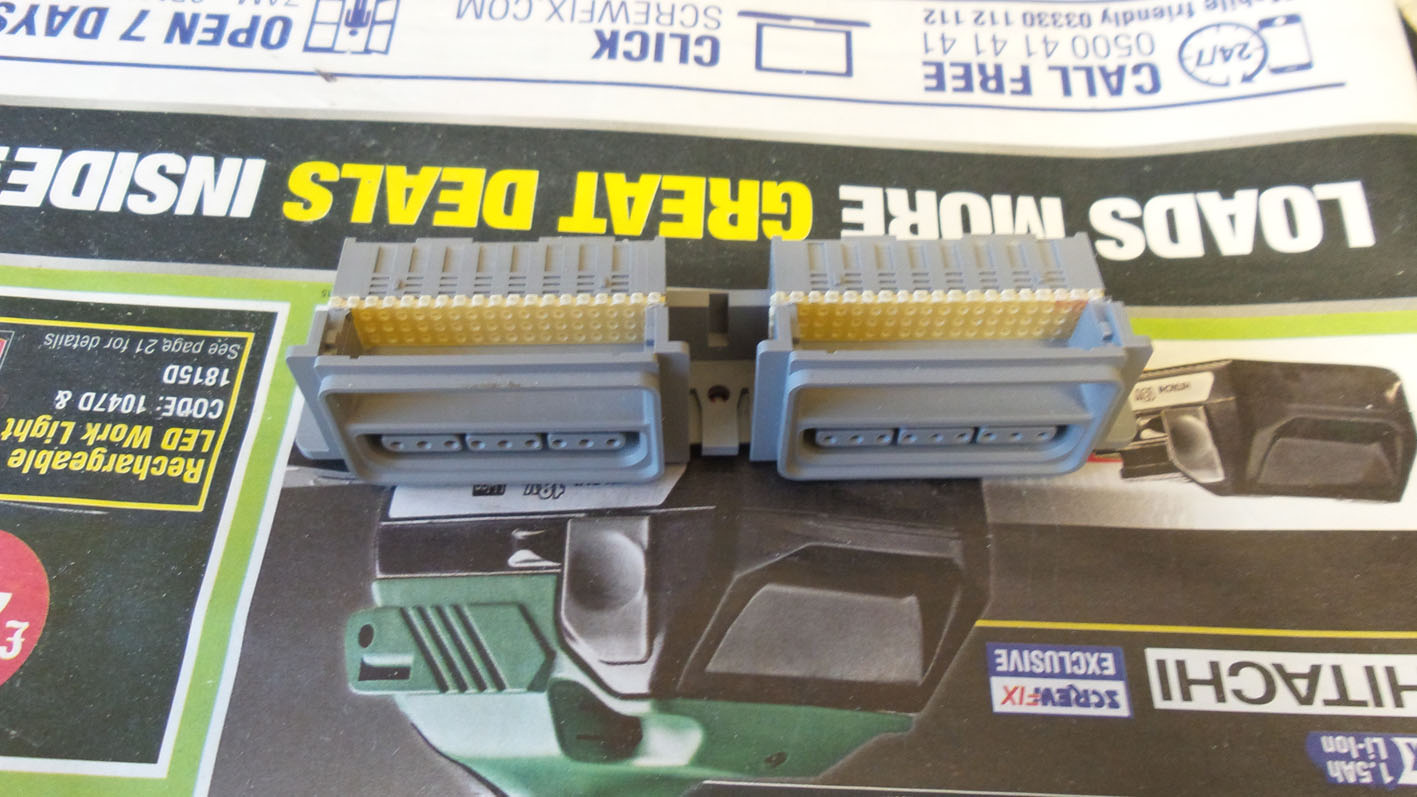
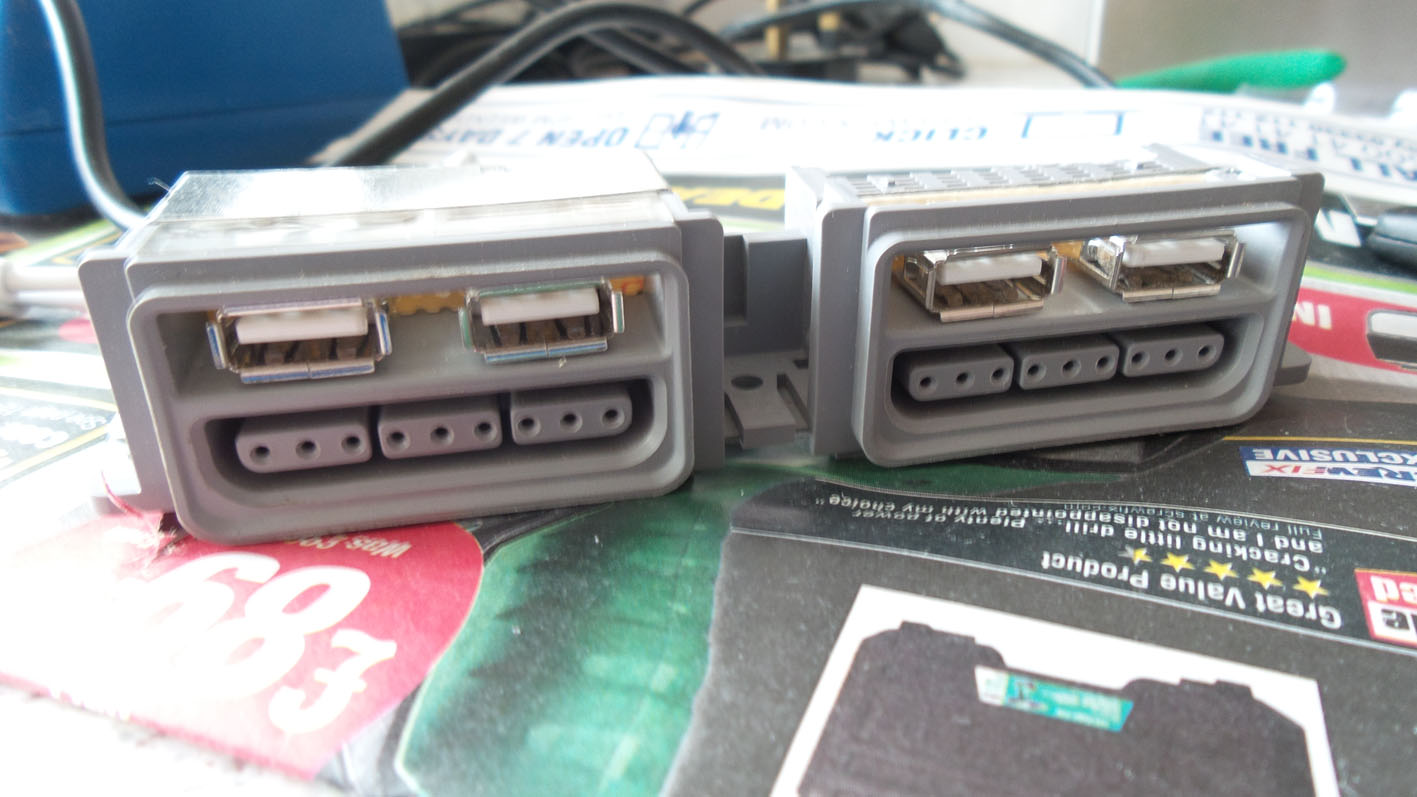
The output from the power supply then goes through the original power switch then to a new 5v green led then to the Pi I mounted inside, the reset switch is wired to the Pi's reset terminals. I removed the pcb from the back of the controller section and removed the memory port flaps so I could add usb sockets and did this by cutting 2 strips of stripboard (or whatever it's called) and dremeled grooves for it to slide into place. Then I soldered 4 usb sockets to them and usb plugs so they just plugged straight into the Pi's usb sockets inside, re-assembled the controller bit and hot glued around the back of the stripboard to keep them nice and firm.
I then got a dual Playstation to usb adapter off ebay for 4 quid and removed the plugs and soldered the wires to the original terminals on the back of the Playstation controller ports
 .
.
I used the HDMI extention thingy that came with my chromecast and mounted it through the hole where the AV socket was on the case and plugged that into the Pi. The Pi is mounted at the rear behind what was the serial port (which I dremeled bigger as the access the micro sd card from the back, which also gives access to some other connector on the Pi which I havn't looked into what it does
).
So... the setup of the Pi was done before all this having to put the Playstation bios in and change a few settings (all done via info and video's found on the net).
The copying of game images is actually quite easy to do with a flashdrive and no ftp nonsense.
I borrowed a video from youtube that someone had made as a boot sequence for my Pi Station too
.
I now have a 64gb sd card full of Playstation Games and a backup image on my pc.
So, a few pics now and a video of it booting while I was making it.
The video:-
and the pics:-


Russ2016-09-30 19:06:45
I know others have done similar to this around the world so after I bought my first raspberri pi I wanted to do something 'special' with it and not just put it in a normal Pi case.
I do have a few other Pi's now (the older model B) running Nes/Megadrive games etc. with retro look alike usb controllers but that's another story... and the same type as that is also in my 'Weenix' cab, this one is the model B+ Quad core one with the gig of ram that runs Playstation games in Emulation Station via Retropie just fine,
anyway onwards...
So I had a look in the attic for a donor Playstation and had a choice of 7...
The power supply I used is from a Samsung tablet as it has a figure 8 input on it an can be mounted inside neatly, I had to cut a section out of the power board for this but the fit was great afterwards.
I cut the end from a figure 8 lead and stripped back the casing so I could solder this to the boards original figure 8 socket and then plug into the socket on the power supply mounted inside then from the outside you couldn't see a difference.
The output from the power supply then goes through the original power switch then to a new 5v green led then to the Pi I mounted inside, the reset switch is wired to the Pi's reset terminals. I removed the pcb from the back of the controller section and removed the memory port flaps so I could add usb sockets and did this by cutting 2 strips of stripboard (or whatever it's called) and dremeled grooves for it to slide into place. Then I soldered 4 usb sockets to them and usb plugs so they just plugged straight into the Pi's usb sockets inside, re-assembled the controller bit and hot glued around the back of the stripboard to keep them nice and firm.
I then got a dual Playstation to usb adapter off ebay for 4 quid and removed the plugs and soldered the wires to the original terminals on the back of the Playstation controller ports
I used the HDMI extention thingy that came with my chromecast and mounted it through the hole where the AV socket was on the case and plugged that into the Pi. The Pi is mounted at the rear behind what was the serial port (which I dremeled bigger as the access the micro sd card from the back, which also gives access to some other connector on the Pi which I havn't looked into what it does
So... the setup of the Pi was done before all this having to put the Playstation bios in and change a few settings (all done via info and video's found on the net).
The copying of game images is actually quite easy to do with a flashdrive and no ftp nonsense.
I borrowed a video from youtube that someone had made as a boot sequence for my Pi Station too
I now have a 64gb sd card full of Playstation Games and a backup image on my pc.
So, a few pics now and a video of it booting while I was making it.
The video:-
and the pics:-
Russ2016-09-30 19:06:45

")