Gradius IV & restoring John Bud’s Konami Windy 2 cabinet

Dickibow

Newbie
Feedback
4 (100%)
Credits
93CR
No way!!! So I have you to thank! Thank you!

I didn’t have the key for the control panel locks, so I replaced those. Luckily they weren’t locked, so I could swap them out easily. If I ever come across the key, I can still reuse them.

Thank you for helping John get this cab together, I really do appreciate it. He was definitely struggling towards the end but he wouldn’t admit it.
 

Dickibow

Newbie
Feedback
4 (100%)
Credits
93CR
Just when I thought it was finished:

I was lucky enough to blag another trip to Japan with work. I’ve not been since the acquisition of my Gradius IV game two years ago, and It’s such a lovely time of year to go I couldn’t refuse. The cherry blossom was just starting to bloom and the temperatures were beginning to pick up after Winter. I knew I couldn’t come back home with another arcade game…..she would have killed me……but there was no harm in looking, right?!

Amazing view of Mount Fuji on final approach to Haneda (HND):


It was a little early for the full cherry blossom season but there was still some to be found:


The Tokyo tower looked fabulous in the Spring sunshine.:


As soon as I landed, I quickly dumped my stuff in the hotel room and got changed. I had packed some special trainers that I don’t often wear, but because of the dry weather, and because of where I was, I put them on straight away!

Posh Nintendo inspired Puma trainers:


My colleague and I left the hotel straight away to catch a train from Yokohama to Tokyo. He was meeting a family member in Shinjuku, so I remained on the train for a few more stops and alighted at Akihabara (Electric town gate) because this time I was on a shopping mission - and that was to find joysticks and buttons for project cabinet number two which is secretly underway….! I know I can buy them online in the UK, but where’s the fun in that?

I had seen a shop on the Internet that I had wanted to visit, however, there were some amazing arcade places en-route, so I decided to stop off there on the way and begin by heading to Super Potato to see their cabinets, and also Taito (Hey!). I had seen the cabs in Super Potato before, but this time I came armed with a stash of 100Y coins! I also really wanted to inspect the cabs up close.


The cabs in Super Potato are a little rough around the edges but considering they’re still very much work horses, the screens were well adjusted and the atmosphere in there was great. It gets a bit hot in there so be prepared to strip a bit if you want to stay. After a light bash on Metal Slug X, and a serious hankering for a Sega Astro City machine, I headed towards Taito Hey!

Well…..what can I say? If you’ve never been there, it’s incredible. On the first floor there are some claw machines and a plethora of Egret 2 machines. I have never seen so many together all in one place - I counted them……62 in total!


There were six machines in a row…..Gradius, Gradius 2, Gradius 3, Parodius, Parodius Da and Gokujo Parodius.

Obviously I was disappointed that there was no Gradius IV but no worries, I was still armed with my stash of coins and I decided that I wanted to play me some Gradius 2. All the machines were in use because it was a Saturday afternoon and was busy. But no bother, I thought to myself…..I’ll just sit and wait. Well, the guy on Gradius 2……what a pro he was!! I was in awe of his ship placement and skills - there was no way I was getting on to that machine any time soon. At one point he arrived at a boss, parked his ship in an area of screen and picked up his bottle of tea to casually take some sips (no pause screen). The boss was rapid-firing like mad, yet all his efforts missed the player’s Vic Viper!! Meanwhile, the player casually placed his drink back down on the cabinet and screwed the cap back on. Then he simply resumed where he left off, and obliterated the boss within a few seconds. Absolute skill and dedication - he was clearly a very experienced player and it was a pleasure to watch.

The players on Gradius 2 and Gradius 3 were seriously skilled. Also, check out the high scores on the games:


Anyway, enough arcading and I finally found the shop I was looking for, called “MAK” - I needed two Sanwa joysticks and 14 buttons. Whilst I was in there, I saw a limited edition Seimitsu 45th anniversary joystick on display. Sadly, it was already sold and they didn’t have any more left. What a shame!! It looked soooo nice, with its shiny gold shaft and special knob…..

I managed to buy the new bits I was after and had a look at the game boards for sale. I was tempted to get a Marvel Vs Capcom but decided against it in the end. On the way back to the hotel I stopped off at some second-hand shops and bought a couple of PlayStation games that I had been secretly after (Parodious, Jikkyo Oshaberi Parodius, and Espgaluda for the PS2). I also bought an official PS1 RGB cable that I found in a junk bin for £15. I thought that was a bargain despite it being a JP-21 connector (even though it looks the same as our European scart leads, it’s wired differently and is incompatible). I knew I would need an adaptor for the cable to work with my UK spec Trinitron, so I swiftly ordered one from Ali Express whilst I was on the train heading back to the hotel.

It would have been be rude not to stock up on some rare Japanese treasures whilst I was there. Amazing second-hand condition as always - don’t forget to take your passport for tax-free prices!


Meanwhile, that night back in the room, I was reading up about that fabled joystick I had stumbled upon, and I discovered that @Arcade Parts UK had some in stock! Omg what a coincidence! They had secured 10 items and I ordered one straight away. It was a little expensive considering what the cost was in Japan, but beggars can’t be choosers, and seeing as I play Gradius IV pretty much every single day, I thought how great it would be to have a stick that I can literally customise however I wanted it.

I eagerly awaited the delivery of my posh new individually numbered joystick (850 units) but with work and stuff I didn’t really have time to install it when it arrived. Well, roll forwards to today and it was raining this afternoon, so I thought I would spend some time customising the joystick and then get it installed into the Windy 2.

The 45th edition joystick comes packaged in a green box:


You’ll recall from my Windy 2 build that the Sanwa joystick I installed had an extended shaft. In hindsight it was actually a little too long, despite the fact that I spaced it away with some rubber washers. I also fitted a slightly stiffer spring. I actually prefer the stick on this machine to be quite loose because Gradius at times requires some finesse so some light finger movement is all that is required.

I opened the bright green box and was greeted with the rare pre-order bonus of the 45th anniversary Seimitsu sticker pack. What a treat that was, and one which I definitely wasn’t expecting. As usual, a little packet of sweets was also enclosed - a little sustenance for the afternoon!

Inside I was surprised to see the sticker pack, which was meant for customers who pre-ordered:


Inside the box were a load of customisable parts. There was obviously the golden joystick, two types of dust covers (interior and external), two types of joystick tops (ball and bat type), three additional springs, four spacers for extending the shaft, four different pattern gates, and an adapter mount.


Ooooh where to begin!!!! I was buzzing with excitement! I offered the joystick up to the Windy 2 control panel, and I realised that Seimitsu orientate their stick in landscape, rather than portrait. It did fit on the mount sideways, but it was really close to the D button blank.


My OCD couldn’t deal with that - if I put a button in that hole, it would definitely interfere. So, I rotated the mount plate by 90 degrees to orient it portrait style. The shaft, was way too short though, so I added all four spacers. It was still a little shorter than my extended Sanwa joystick, which was actually a good thing, because in hindsight, that was a little too tall for a candy cab.

The pattern gate attached to the new swanky joystick was circular, and that was weird to use! I mean, it would be perfect for a fighting game, but the 8-way direction of Gradius would be better with something else. The box contained an octagonal adapter which I thought would be perfect!!


Spoiler: I tried the octagonal gate, and it just felt a bit odd. I don’t know if it’s because I’m used to the square gate, but in the end I took it off and installed the square gate (with rounded corners).

I tried all four springs and in the end I went with the basic spring. I stretched it out a bit to make it feel a tiny bit stiffer. The other three were just too stiff for the Gradius games.

There’s a lot you can change with this joystick straight out of the box:


The springs in order of stiffness from soft to hard: 1)black, 2)green, 3)purple, 4) yellow:
 
Last edited:

Dickibow

Newbie
Feedback
4 (100%)
Credits
93CR
I also tried the bat style joystick top that was included and it was AMAZING!!!! So precise to use. I really like it!! But……it doesn’t match! I might have to get a white version for my OCD to be satisfied, but for now, my existing white ball top will do.


Finally, I installed my secret new dust cover…..not the Seimitsu 45th edition one, but a Murakumo type which I discovered on the Arcade Parts UK website by mistake, but I think it complements the blue colours of the Windy 2 absolutely perfectly!


I tested out my new joystick after building it all up, and had a bash on Gradius IV. I started the game up and tested the controls first in the test menu to make sure the orientation was correct for the up/down/left/right movements. After passing the test, I started the game - weapon mode 6, and force field (the best choice!), and then I started! One coin. No continue. I got all the way to the usual death section of level 6 (where you have to shoot and fly through the veins). But I got my highest score ever!!!

Is it just a co-incidence, or is it the new joystick? Who knows…? Either way, I love it, and it really sets off the machine. On the underside of the control panel, I also stuck one of the limited edition stickers to it so that when the next person looks inside, they’ll realise what is fitted.

I literally adore this cabinet and game. I can’t wait for the next one to now be finished.
 
Last edited:

Zionfarm

Newbie
Credits
20CR
Real quick side question for the group. I am putting my chassis back into the cab and I didn’t take a photo of which socket the VGA 6 pin plugs into the chassis? They’re two male ports on the chassis. A black one and beige one. I looked up a schematic but no luck.
Photo attached for clarification.
By the way my Windy has the original chassis and tube. Thank you guys cheers.
 

Attachments

  • IMG_4367.jpeg
    IMG_4367.jpeg
    132.6 KB · Views: 11

69er

Active member
Feedback
6 (100%)
Credits
1,617CR
Just when I thought it was finished:

I was lucky enough to blag another trip to Japan with work.
I knew I couldn’t come back home with another arcade game…..she would have killed me……but there was no harm in looking, right?!

If she is like mine … she probably gave up googling for ‘Therapists’ a long long time ago 😂😂😂 ! ? !
 

Jimboi

Newbie
Feedback
1 (100%)
Credits
23CR
Real quick side question for the group. I am putting my chassis back into the cab and I didn’t take a photo of which socket the VGA 6 pin plugs into the chassis? They’re two male ports on the chassis. A black one and beige one. I looked up a schematic but no luck.
Photo attached for clarification.
By the way my Windy has the original chassis and tube. Thank you guys cheers.
I can confirm from my assembled one that it works in the white/beige one. Not sure why there’s two as it auto switches.IMG_6338.jpeg
 

Dickibow

Newbie
Feedback
4 (100%)
Credits
93CR

Zionfarm

Newbie
Credits
20CR
Convergence and kilohertz:
The search for a monitor chassis continued. The Windy 2 came from the factory with Toshiba monitors and a Toshiba chassis (PB7534). This chassis has the ability to decode and display video signals in either low, medium or high resolution (15/24/31kHz). It’s sometimes referred to as a tri-sync chassis. I scoured the internet for months looking for one. Even to this day I have never found one, but I found some other restoration builds online for this type of cabinet, and with my same monitor. I think some Windy 2 cabinets shipped with slightly different Toshiba monitors but according to two other forum users, they had success fitting a tri-sync Nanao MS-2930 chassis to theirs. I decided that I would try the same! I put a wanted post on UKvAc and a very kind user said that they had one in their storage unit and would send pics at a later date. True to their word, the pics arrived. It looked like a green circuit board to me but I didn’t see any burn marks on it, and I was assured that it was fully working when last used a few years ago. By the end of the week, the new chassis had arrived and I tried to install it the following day.

No, it turns out you can’t just install a different chassis into another monitor! The plugs from my monitor (I had four) didn’t fit onto the pins on the chassis. I contacted a very helpful guy in Paris who makes adapter cables and he made me some adapters for the four wires I needed to hook up (horizontal circuit, vertical circuit, degauss circuit, and ground connection on neck board). Whilst the adapters were being made for me, I needed to research how to plug these wires into the chassis. Where did each wire go? Which orientation? The colours of my monitor wires didn’t match with the colours written on the chassis board. Again, UKvAc to the rescue and in particular, a shoutout here to Gunblade. Not only did he advise me of where these wires should go and what they would do, but also offered me advice for how to test the yoke before connecting up the chassis for the first time. Each yoke is different, and although you could have two monitors with the same tube number, if they were from different arcade machine types, or from different television manufacturers, chances are the yokes were also different.

I decided to buy a LCR inductance meter, and after testing mine out, the specifications were pretty close to what the Toshiba PB7534 worked with. I decided to bite the bullet and hook in the chassis with my newly received adapter cables. The red/blue wires from my monitor went to the helpfully labelled red and blue pins, and the yellow/green wires went to the brown and yellow pins. The white degauss cable went to the two pins in the corner of the chassis, and the single ground wire, went from the metal strap on the rear of the tube to the single pin located on the neck board.

I plugged everything in, held my breath, and with my fingers hovering over the power switch (in case of explosion or smoke), I hit the switch. I instantly heard a static crackle and I eagerly ran around to the front of the cabinet. I couldn’t believe it, but I had a picture! Ok, it looked terrible, but I had a picture!!! It was out of focus, it was upside down, it was back to front, and it was the wrong colour. But I had a picture!! The monitor worked!!

Not the best looking image I think you'll agree, but it was at least a picture:


I tweaked the knobs on the flyback to focus the image and to reduce the brightness. There was a lot of colour bleed from text which I needed to resolve. I turned the monitor off and swapped the orientation of both wires around and restarted it. The picture was now the right way up and was starting to look much better already. I continued to adjust the picture by tweaking the remote adjustment board and was able to check the geometry with the grid test pattern built in to the Gradius IV test menu. The convergence was looking pretty poor though, and the screen desperately needed a degauss.

Slowly, I managed to improve the picture:


Degaussing was easy, push the button a few times on the windy 2 power supply and the screen wobbles and the colours returned! The convergence was tricky, and even now, right in the far corners, on a grid pattern you can see that the lines aren’t 100% perfect. However, I’ve tried and tried and I think I’ve got the screen pretty much as good as I can get it. If you have seen the back of an arcade tube before, you’ll see a set of metal rings attached between the tube and yoke. These are called convergence rings. I didn’t know what they were either, but apparently by twisting them, you can move the red, green and blue pixels to overlap to create a crisp white image. The internet is truly wonderful and several YouTube videos and forum tutorials later, I learned what to do. Once I had gotten the image as good as I could, I got a permanent marker and drew a line on the rings. That way, if I wanted to fine tune them at a later date, I would have a bench mark to return to. It’s so easy to twist one of the rings and to have the others next to it also turn. Before you know it, the picture is worse than it was when you started!

What an improvement. The picture started to look so crisp:


The colours were now vibrant and bright:


The cooler the better:
So….thats it. Everything is working and the arcade machine is running. Well, not quite. I had an exhaust fan attached on the rear of the access hatch which wasn’t plugged into anything. It was definitely a Konami fan. It had the proper cable and connectors, but nothing to plug into. All the power receptacles on the power supply were in use except for one labelled AC100v. Well, that wasn’t going to work with my DC 12v fan was it? Or was it….? I bought a small transformer that converts AC 100-240v into DC 12v. This transformer was tiny and only cost a few pounds from eBay. I researched the plug type and discovered it was a JST standard plug (Link to my other post!) and I connected it up and the fan started working! Nice! Heat and dampness wreak havoc with arcade electrics so any chance to remove heat is a bonus.

Neat little transformer to power the rear exhaust fan:


It turns out that not all Windy 2 cabs have exhaust fans. Mine is an early example, and shouldn’t have a fan equipped to the rear access hatch. Those that do (later models) have a different power supply that outputs the correct power type. Seeing as I didn’t have the plain (non-fan style slated door), I decided that keeping the fan was a better idea. The only problem was, that the fan was super noisy. Exhaust flow was good, but far too noisy. I planned on relocating the cabinet to the house eventually and I preferred it to be quieter. I bought a 92mm Noctua fan which is much quieter. You can still hear the air flow extraction, but there is hardly any noise from the motor itself. I’ve kept the old fan though in case I want it for the future.

Picked up that same transformer on Ebay. I want to do that same mod to my unit.
 

Dickibow

Newbie
Feedback
4 (100%)
Credits
93CR
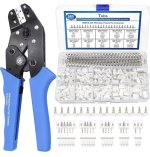
Good idea - mine is still working great. You’ll need to buy the JST plug housings, and a crimp tool which I mentioned in this thread.

I also bought a fan extension cable from eBay, if I remember correctly. The standard Noctua fan cable wasn’t long enough.
 
Last edited:
Top