PhilsArcade - Cab Restorations

Phils Arcade

Senior Member
vacBacker
Feedback
10 (100%)
Credits
1,461CR
YouTubeBack001.jpg
Okay ye'all. I'm looking to start this thread to cover any work ongoing on the cabs I'm restoring, or new builds. These are not multi-cade machines, though may have some Mister involvement, or similar.

If you'd like to follow along, I'm doing posts here.
Also hoping to upload progress videos at: https://www.youtube.com/@phils_arcade
You can also follow along on my FaceBook, which I know some have no intension of joining: https://www.facebook.com/InfuriousLtd/ (Yes it's infurious)
And my website, if I can ever get around to updating it, ugh! https://philsarcade.com/

Hope the admins are happy enough with this. Follow along on whatever platform, and wish me luck, lol.

First set of posts coming up later today.
 
Last edited:

TheDaddy

Senior Member
vacBacker
Feedback
14 (93%)
Credits
7,133CR
Okay ye'all. I'm looking to start this thread to cover any work ongoing on the cabs I'm restoring, or new builds. These are not multi-cade machines, though may have some Mister involvement, or similar.

If you'd like to follow along, I'm doing posts here.
Also hoping to upload progress videos at: https://www.youtube.com/@phils_arcade
You can also follow along on my FaceBook, which I know some have no intension of joining: https://www.facebook.com/InfuriousLtd/ (Yes it's infurious)
And my website, if I can ever get around to updating it, ugh! https://philsarcade.com/

Hope the admins are happy enough with this. Follow along on whatever platform, and wish me luck, lol.

First set of posts coming up later today.

Looking forward to seeing these , It realy helps others to get motivated !

good luck,

Dave.
 
Last edited:

qjuk

Active member
vacBacker
Feedback
50 (98%)
Credits
1,945CR
Nice bunch of projects to keep you busy Phil :D

I did wonder who purchased that Euro Atari cab from PJ (think it was previously a Fast Freddie). I was interested, but looks like you beat me to it :)
 

Phils Arcade

Senior Member
vacBacker
Feedback
10 (100%)
Credits
1,461CR
Nice bunch of projects to keep you busy Phil :D

I did wonder who purchased that Euro Atari cab from PJ (think it was previously a Fast Freddie). I was interested, but looks like you beat me to it :)

Had to wrestle it from another member on here. He that has the power to kick me off, lol.
But my totally insanity won out :)
 

Phils Arcade

Senior Member
vacBacker
Feedback
10 (100%)
Credits
1,461CR
A little late, but hey, we're off.

The background
So long, long ago, in a shed not too far away, there was a young man that used to fix up and repair electronic PCBs and build the odd arcade machine. This work eventually diminished, as the need for old, single sided PCBs was taken over by new fangled two sided versions. What had the world turned into.

So he eventually faded away and died. Died of boredom that is, and reluctantly, he went into programming, where he still works to this day. But in the back of his mind, he knew, he really wanted to get back into the old school of arcade machines. Not the flimsy single chip, just slightly thicker than cardboard versions of today, but the old, heavy, would kill a man just for looking at them sideways, type of machines. So with the help of friends from across the BIG pond, he started to draw his plans.

From a number of sites he started to collect the boxes and parts needed to get to where he belonged. Machine after machine was set aside for his diabolical plan, and eventually those boxes made their way, slowly, across the sea, to a little know town, called Sheffield. From there, they were gathered together and hitched a ride overnight to the all powerful, land of green, and Guinness. There, tired and weary, falling apart, they finally settled into their new home, and a well deserved rest.


The collection
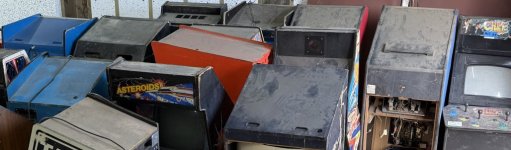
I'm not one to look at an old arcade machine and think, yeah, that's had its day, off to the dump you go. I've seen way too many machines headed off to the recycling centre, or set alight and know if I could, I would have taken that. I'm not a miracle worker, just love the challenge.

These machines came here via PJ on Facebook at Arcade Imports UK, from CoinOp Amusements, As Found Arcade Machines, and Player 1 Arcades, with various bits'n'bobs from all over. Even nabbed one or two of PJs to add to the mix.

This has been a long time coming, taken 3 containers from various places in the U.S. to get this lot over to Ireland, and into the workshop.

So let's pick one and get started.
 

Phils Arcade

Senior Member
vacBacker
Feedback
10 (100%)
Credits
1,461CR
Atari - Centipede 01 - part 1
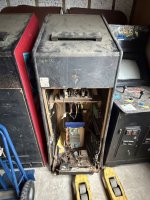
This had to be the first of the machines to get started on. Basically it was that far gone, the entire base had come away and the front panel has been pulled back along with it. Moving the cab wasn't easy as everything looked like it wanted to collapse in on itself.

Centipede_01_01 Large.jpeg Centipede_01_02 Large.jpeg


You can see in the first image above how the base is sitting behind the back edge of the side panels.Most of the wood looks swollen to some extent all over. Pulled the cab out into a more open section of the floor to get a better look at it.

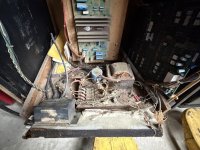
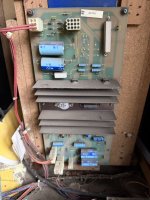
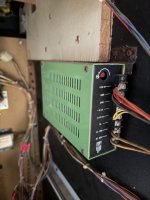
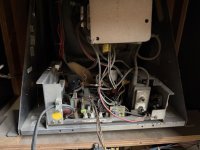
Each of the components in here, I think, looks worse than it is. The power supply is very dirty and full of rust. It's nice, though, to see the audio power regulator board not burned up. Usually when you get these, something bad has gone wrong, and the PCB itself has scorch marks, or worse, holes!

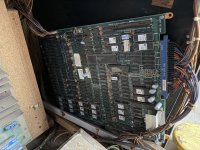
So, those of you in the know, will see the main Centipede PCB is missing, as this was converted at some point into a Time Soldiers game, and the new power supply to supply it, so not having to go through the original power board. The Time Soldiers PCB looks to be in very good knick compared to the rest of the cab. No bad scraps or rusted chips which is nice. Pull this would and get it tested on the workbench.

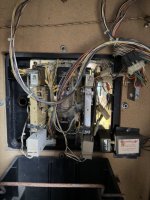
As this is a conversion from an Atari Centipede, the wiring loom has been hacked up, so another wee job to ensure that is back to the way it was before.

Centipede_01_03 Large.jpeg Centipede_01_04 Large.jpeg

Centipede_01_06 Large.jpeg Centipede_01_05 Large.jpeg


The coin door is full of rust on the front face, but the back of it seems to be in fairly good condition, along with the frame. Even though the lock is missing it still seems to have the original keys mounted to the back of the door, which is a nice bonus.

The CRT is an RCA monitor, not what would have been installed originally. The monitor mounting board has been hacked somewhat, in order to get the screen to fit. Would have been nice to still have the original, but not the end of the world. Again the chassis on this is full of dust and crud, but looks to be in a decent shape from what I can see. Will know better once I can get it pulled out and inspected properly.

Centipede_01_07 Large.jpeg Centipede_01_08 Large.jpeg

Seems there's a limit to the number of images you can attach to a post, so will have to break these up into separate posts.
Suppose, it also means less to go wrong if something bad happens and I loose anything I've typed in, lol.
 

Phils Arcade

Senior Member
vacBacker
Feedback
10 (100%)
Credits
1,461CR
Atari - Centipede 01 - part 2
Once all the components have been removed from the cab, it was time to look at the condition of the actual wooden structure. As mentioned the base is a mess. Looking at it once cleaned and in the photo, doesn't seem too bad, On closer inspection, you'll notice some of it is 3/4" tick and other parts 1" thick. Also the amount of moisture this this has consumed makes it a lot heavier, at least you can tell the difference from this and the one in my collection.

The coin bucket holder, monitor support and hacked CRT panel all aren't too bad.

Centipede_01_09 Large.jpeg Centipede_01_11 Large.jpeg

Centipede_01_14 Large.jpeg

The side panels had a blue melamine sheet stuck to it, same as the other Centipede cab I have here, except that one's red. The glue holding it on has passed its sell by date by a long margin by the looks of it, and on peeling it showed the original graphic artwork, which apart from the red/brown glue stain, adds to the look of the artwork.

Interestingly, it was the control panel that was holding the front panel and base together. When I unlatched the panel and pulled it back the entire front, along with the control panel, fell forward. Although the monitor CRT panel was screwed and glued together, even Hercules would have had problems getting it off.

The the amount of swollen wood on this, I've decided to pull the cab into its component parts, and make a new base and side panels. I'll be taking measurements directly from this cab in order to be able to make other "new" Centipede cabs in the future, but we'll get this one up and running first.

The original side panels, I think I'll clean up somewhat and have them sold/mounted as art pieces. What do you think?

Centipede_01_27 Large.jpeg

Next up will be stripping the control panel. This has the SNK rotary joysticks, although both have a bit of an issue.

Stay tuned.
 
Last edited:

Phils Arcade

Senior Member
vacBacker
Feedback
10 (100%)
Credits
1,461CR
So a few people have been messaging me about what I'm doing with the cabs, and am I going to sell any as projects.

The majority of these came in from the U.S., and bought as project cabs for me to fix up. A few I'm keeping for my own collection, but others will be returned back to their original gaming cab, and put up for sale, to help fund more cabs and projects. Once sorted I'll be putting an ad up on the usual channels.

I'm also interested in producing a number of reproductions parts for these cabs. Not sure what in all honesty yet, but will be adding to in here as well.

I've had one person interested in the panels above as an art piece and gave a few suggestions, so will be looking into that.
 

Phils Arcade

Senior Member
vacBacker
Feedback
10 (100%)
Credits
1,461CR
Atari - Centipede 01 - part 3

So, those side panels, are toast, and as mentioned previously, are going to be turned into a bit of an art piece. The base is a mess as well as the bottom of the front. The back section just disintegrated. The top isn't too bad, but where the speaker is, the wood is crumbling and split right along one edge, so that'll need replacing as well.

Did get an email from a guy in the south of Ireland asking if I could make one, with a JAMMA harness in it, but still keep a CRT screen. This is totally doable. So I'm about to make a couple of Centipede machines, and hopefully fix the other Centipede cabinet as well.

First off, I don't have a nice big CNC machine that I can just grab a file of the interwebbie, and start cutting. I do have a small and even smaller CNC machine. They both need new controller boards installed and then I have to get used to the software, but you are not getting an 8' x 4' sheet of ply in there no, matter what angle you put it at..

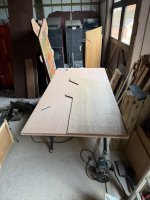
Using the, now dismantled, Centipede, I was able to make a side template. I've already got a Pac-Man, and Defender cab templates made up, so now adding the Centipede to the lineup. Once made, it was a matter of laying the 2 sheets of plywood on top of each other, and drawing around the template.

IMG_1054.jpeg IMG_1055.jpeg


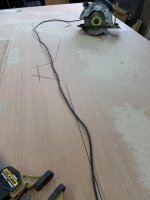
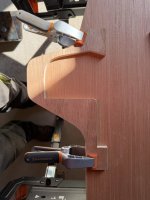
I inset the template from the edges, as these can get damaged moving the boards, or during transit. Once done, it's time to go around the line with the circular saw, just keeping it slightly away from the pencil line.

IMG_1056.jpeg IMG_1057.jpeg

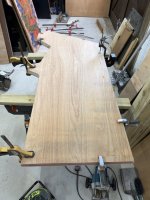
The produces a very close approximation to the template. Next up, we add the template on top again, and clamp everything down.

Next up, is the router, and a bearing bit long enough to trim the 2 sheets of plywood at the same time. Taking it slow and going around the whole edge, bring the rough shape into an exact copy of the original side.

IMG_1058.jpeg IMG_1059.jpeg IMG_1060.jpeg

That's both sides now sorted. Next up will be the base, front and back sections. Also need to see about creating templates for where the control panel rests, and where the top gets secured to.

I'm doing 2 machines here at the minute, one with a JAMMA harness, and the second will be for what was originally in the cab. If anyone else is interested in one, let me know and I'll do those at the same time.
 
Last edited:

Phils Arcade

Senior Member
vacBacker
Feedback
10 (100%)
Credits
1,461CR
Atari - Centipede 01 - part 4

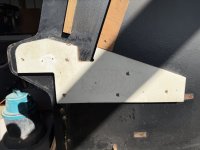
Both sides of the panels have a number of items fixed to the inside. These are used to fix the top of the cab onto, give support for the control panel, somewhere for the monitor and bezel to be located and a place for the monitor to rest on.

In the process of restoring these cabs, I'm also going to be making templates so future cabs can be built to the same sizes of the original. There are a number of plans online that you can download, with a certain amount of guesswork. Some you will see don't have any indication as to how close the drawings are to the original, and others that will say 90%, but no build instructions, so leaves you still guessing.

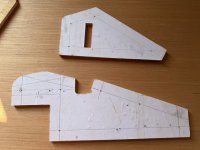
I'd like to get back to building original style cabs again, so will be creating templates that will help creating sections, and aligning various parts of the cab. The first of these will be the top block, used for mounting the top sections onto, and the control panel/monitor rest block.

IMG_1066.jpeg IMG_1067.jpeg

IMG_1065.jpeg

The top block also has a small piece of wood mounted to it for the speaker, lamp assembly to fix onto.

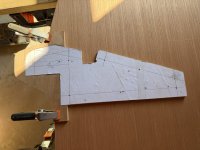
I took some heavy weight paper and sprayed some light adhesive onto each block section and mounted the paper onto it. Tracing around the edge with my finger to leave a good crease, then followed that with a sharp blade to cut out the shape. Once done, the holes were marked, which are never really the same on any 2 cabs, but al least gave an idea, I proceeded to mount the paper onto some template stock and cut around them. Finally drilling out where the screws would go. Ended up adding a few extra, just for good measure. The top block also got a mounting block hole cut to align where the blocks should fit for the speaker/lamp assembly. You can see from the original cab, the top block was made from chip wood and where the top section mounts is from some hardwood glues and pinned into place. I'm going to extend the top block to cover more area since we're using playwood, and use. hardwood strips for the rest of it.

IMG_1068.jpeg


In order to ensure these are fitted to the correct location, not only on each side of the of the panel, but on future builds, another template was made to help align those blocks. These follow the outline of the panel itself, so it's a matter of aligning the location template, clamping it then glueing and screwing the block into place. This makes repeatability very easy.

IMG_1069.jpeg IMG_1070.jpeg


That's the templates for these done, so now onto the base, front and back panels.
 

Bods

Senior Member
vacBacker
Feedback
4 (100%)
Credits
4,972CR
Nice work mate :)

I started working on the rebuild of the Crossbow machine years back, used chipboard and cut the sides out but then couldn't get the same finish for the wood as original cab its like hard very thin melamine type on original cab but with satin black smooth like finish which I can't get from anywhere so I was thinking about redoing with plywood and then spraying it satin black finish, original the side artwork was printed directly onto the sides not a sticker which i cannot do

Amazingly all these years later now I look there are loads selling 8x4 sheets of black melamine sheet, back then hardly anything available but then my worry was if you chip the edges you can't repair it, if it's do in decent ply and sprayed, any issues cutting it you can fill and sand to repair and can respray if needed, i have spray guns to give it decent finish
Got quite a few project machines like yourself I need to rebuild some, repair others
 

Phils Arcade

Senior Member
vacBacker
Feedback
10 (100%)
Credits
1,461CR
Nice work mate :)

I started working on the rebuild of the Crossbow machine years back, used chipboard and cut the sides out but then couldn't get the same finish for the wood as original cab its like hard very thin melamine type on original cab but with satin black smooth like finish which I can't get from anywhere so I was thinking about redoing with plywood and then spraying it satin black finish, original the side artwork was printed directly onto the sides not a sticker which i cannot do

Amazingly all these years later now I look there are loads selling 8x4 sheets of black melamine sheet, back then hardly anything available but then my worry was if you chip the edges you can't repair it, if it's do in decent ply and sprayed, any issues cutting it you can fill and sand to repair and can respray if needed, i have spray guns to give it decent finish
Got quite a few project machines like yourself I need to rebuild some, repair others

I used to get the laminate from JH Hardware in Belfast, but they no longer sell it sadly. You need a good adhesive, I like the 3M impact version, but NOT the water based version, as it seems to delaminate over time.

I'm interested in trying out screen printing the sides of the more popular cabinets, but in the initial stage it'll be vinyl overlays. I've a small project screen printer set up to try it out, and for a few other projects.
 

PAC-MAN

Active member
vacBacker
Feedback
8 (100%)
Credits
453CR
This is great, we need more proper dudes like you on here who aren't afraid to take a project on (or ten)

I'm looking forward to the updates sir and I'm also hoping you will drag me along with you as I also have 5 semi restored cabs I literally turned my back on a few years ago (I covered them over so I don't see them when I go into the Garage)

Go for it and good luck!!(y)

iamproudofyou-my-hero.gif
 

Body pop

Active member
vacBacker
Feedback
24 (100%)
Credits
1,125CR
Looking good Phil
There must be more hours in your days than mine
Unless you don’t sleep
Great write ups and quality work
I do love a bit of centipede
Just wondering now what the project for the sides is going to be
 

Phils Arcade

Senior Member
vacBacker
Feedback
10 (100%)
Credits
1,461CR
Atari - Centipede 01 - part 5

We are now onto the bottom, front and lower back sections. The front of the original chipboard is all swollen and crumbling similar to the back. Actually when moving it, the back basically fell off and turned to dust, that's how bad it was. This all needs to be replaced, so let's start with the front panel.

Just realised as I'm about to transfer the images across to the computer, that I've managed to forget to take any pictures of the bottom, mounting sections, or the back, ugh! Never mind, just use your imagination, and pretend there was several paragraphs showing the immense detail involved and plenty of photos :)

This is what the lower back looks like so you can imagine what the base and front are like.
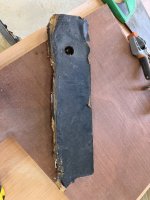
IMG_1089 Large.jpeg IMG_1090 Large.jpeg


Taking measurements of the front, base and back It wasn't long before these were cut out and ready to be worked on. The front had the coin door marked out, and similar to the sides, took to the circular saw to get most of the straight sections cut, then got the rest removed with a standard handsaw. This remove the inner section with just a small inset from the line. Again using my coin door template, removed the last few millimetres with the router.
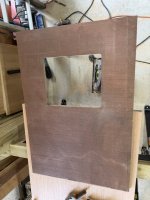
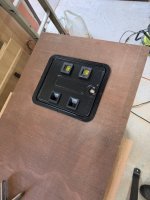
IMG_1075 Large.jpeg IMG_1076 Large.jpeg


I have a fair number of coin doors which I use for my own design cabaret style cabinets, These come with yellow inserts, which I'm not a fan off, but beggars can't be choosers. I would like to try and make new inserts in red, but that's another project for a later date. I do sell these if anyone's interested. They are brand new, and come with coin mech mounting on the back of the door.
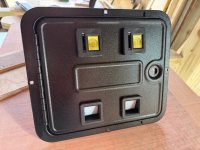
IMG_1074 Large.jpeg


The original panels have a few stickers which I'm going to try a reproduce. I'm sure someone already does these, but I like to try and keep as much as I can in-house as it were.
IMG_1077 Large.jpeg IMG_1092 Large.jpeg


Now that that's out of the way, I'm going to give the current panels several coats of undercoat. Sand them down to a fairly smooth finish, but not too smooth as I want the vinyl overlays to have something to grip onto.

The original Atari cabs had a black vinyl on the front, top and back panels. I've ordered some low satin black, so will see how that turns out. If not, it will be a matter of black paint job. The speaker section was done in matt black formica. I thought I had some handy, but all searches haven't revealed its whereabouts. Might have to order some of this as well.
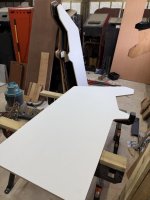
IMG_1095 Large.jpeg


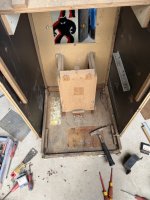
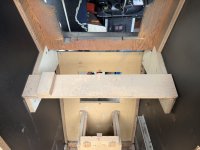
As I wait for the multi coats of undercoat to dry and the sanding to get done, I'll make a start on the coin box holder for inside the cab and get the base finished off. Need to get the supports glued and mounted, as well as add the levelling feet. Once this is in place, it'll be ready for the other panels to get mounted.

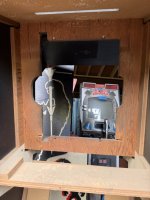
The original top section and upper back all looks to be okay, as well as the speaker/lamp assembly board, so will hopefully be reusing these. I've taken measurements of these for the second cab to be built.
 
Top