STAR WARS ARCADE ARTWORKS - How To

Mikonos11

Active member
Credits
89CR
STAR WARS ARCADE ARTWORKS - How To

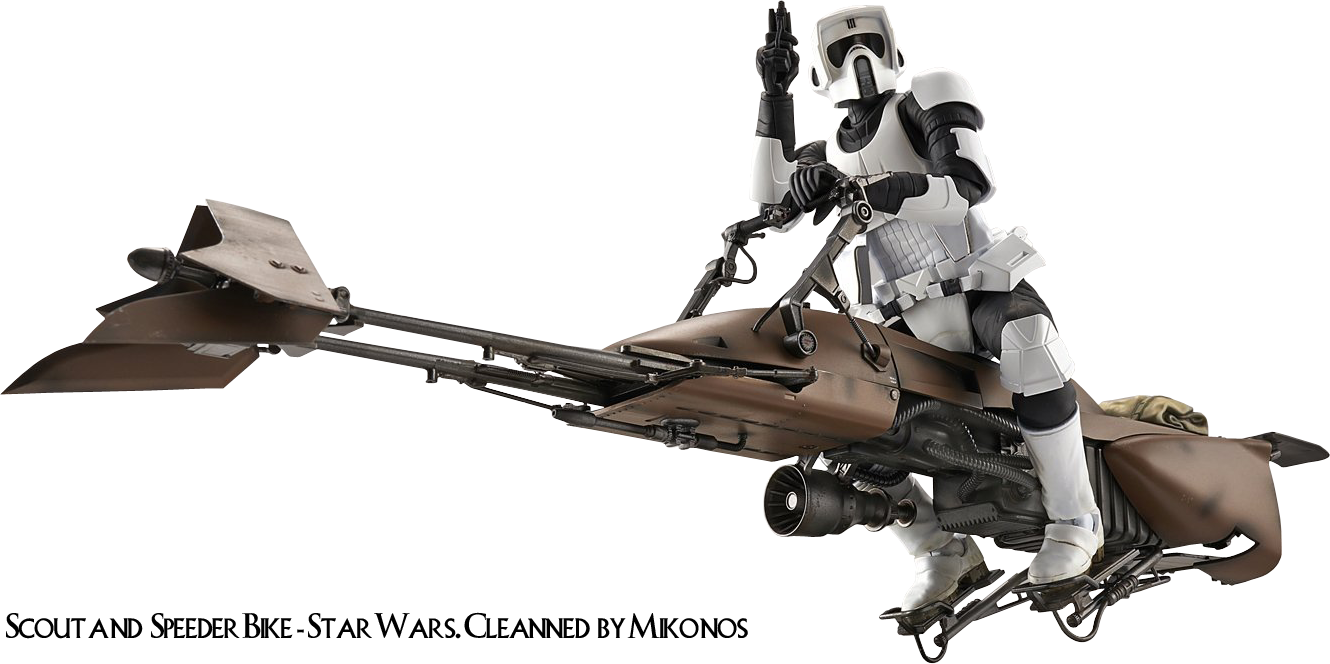
I am a big fan of the "Star Wars" movie saga and I receive many requests from all over the world to design arcade decorations about the Saga. Unfortunately I don't have time to do all the projects that are proposed to me because I am focused on recovering and restoring classic arts from arcade cabinets and pinballs in my spare time.

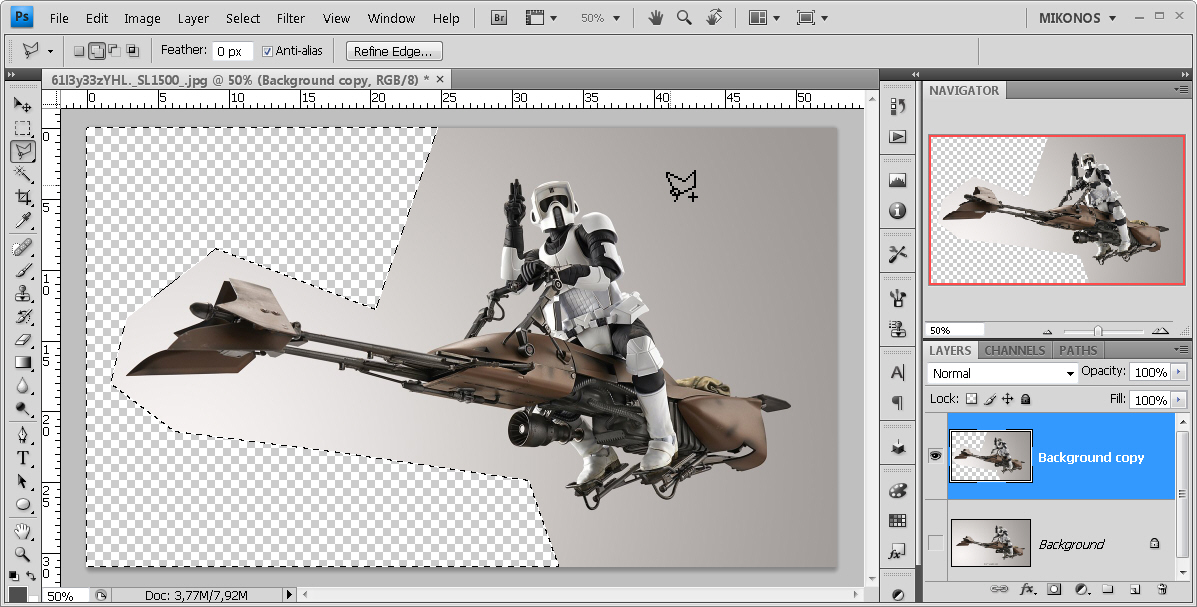
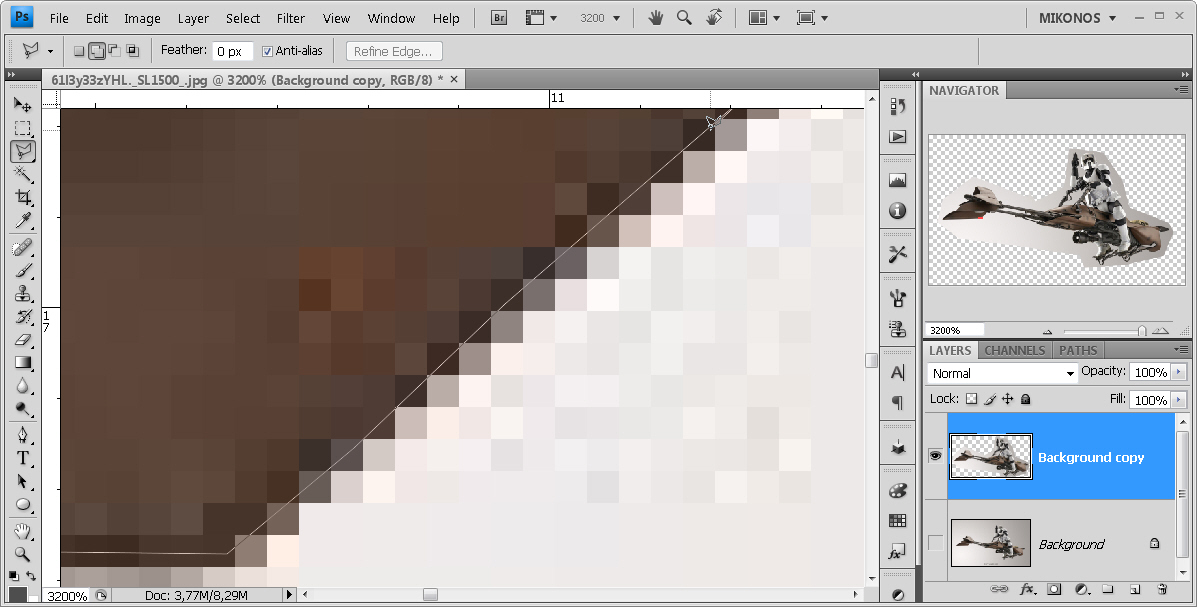
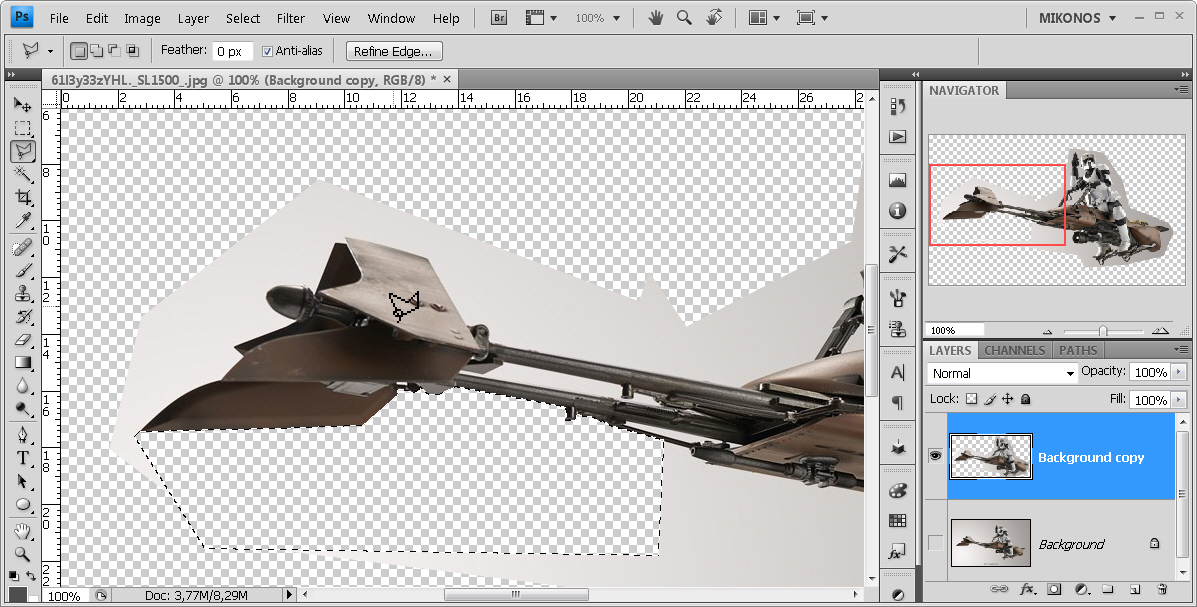
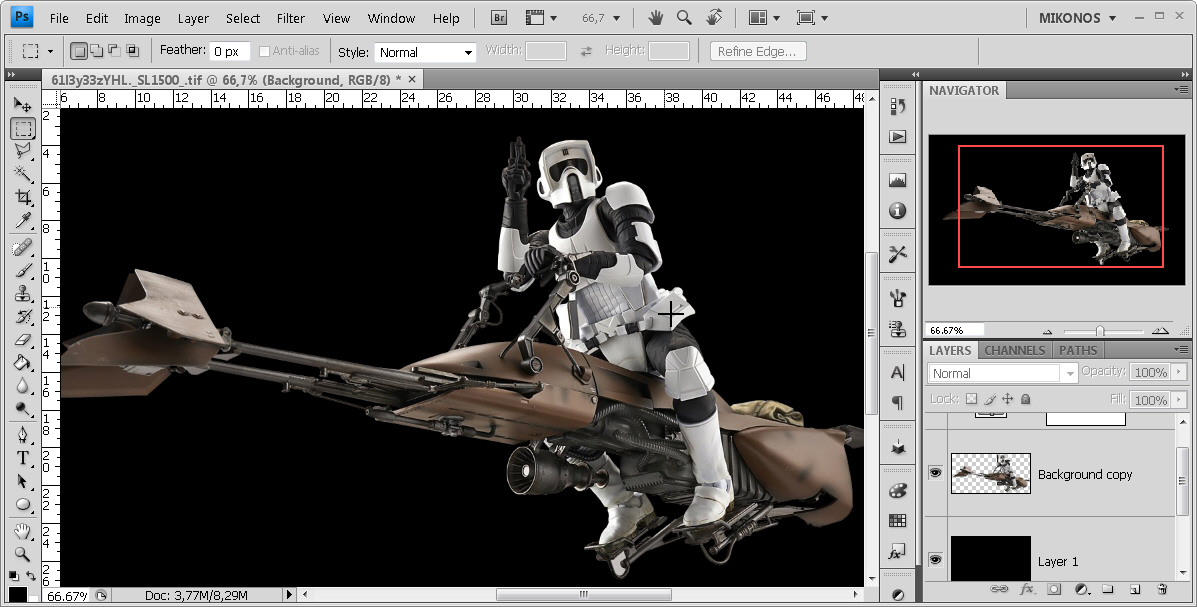
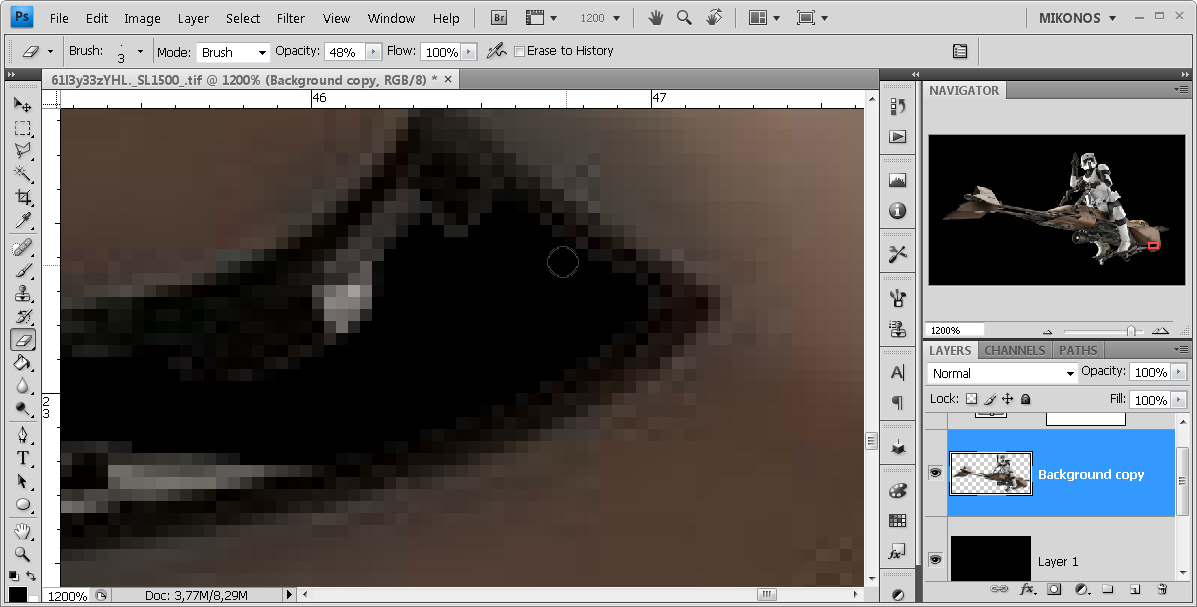
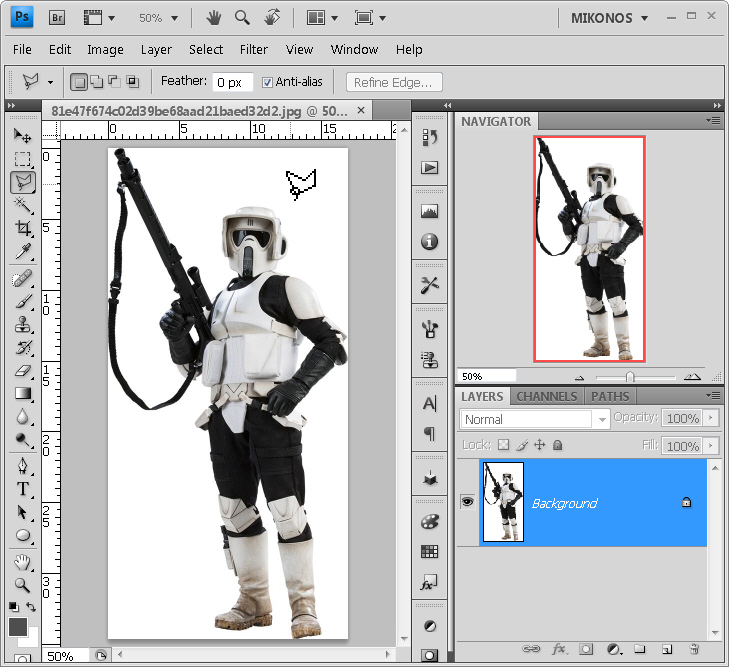
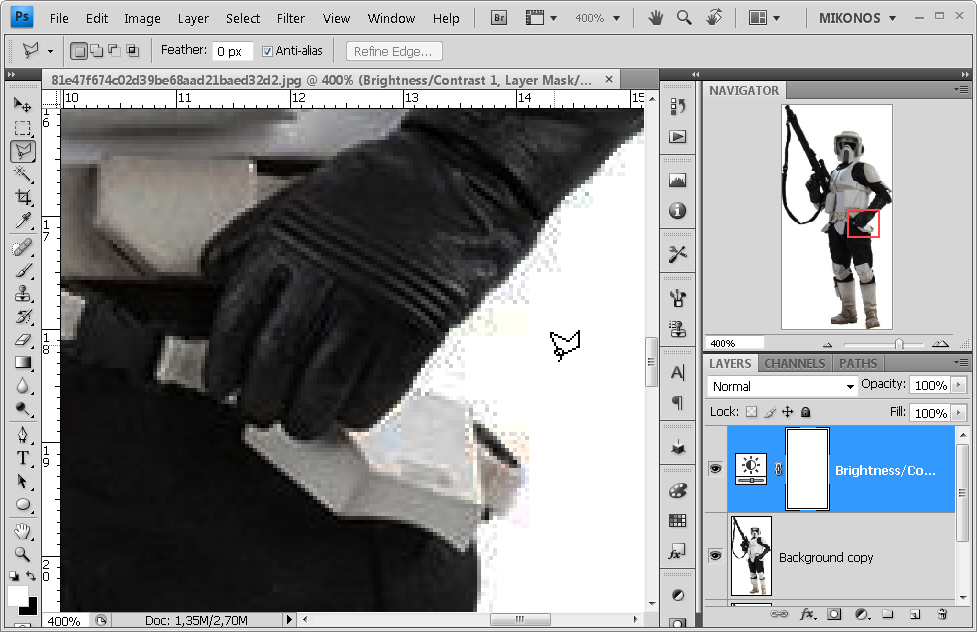
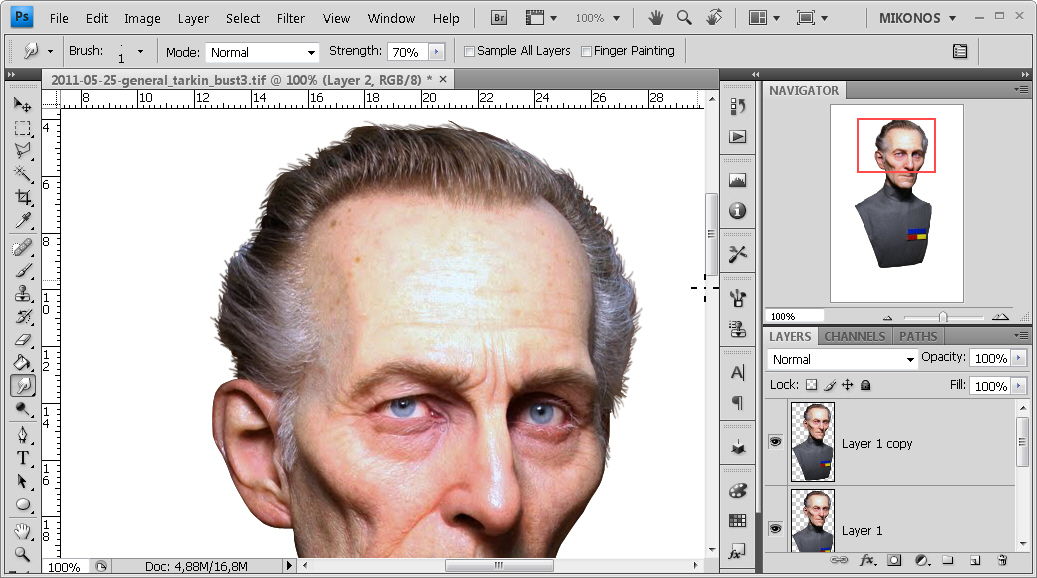
As I have done in my forum, I am going to explain here how I make the designs so that you can make them yourself. I will start from the most basic to the most complex, this will be an extensive tutorial.

I am not going to explain basic things about Photoshop, for this you have many tutorials and video-tutorials. I will focus on explaining tricks and techniques to make good compositions and give them dynamism.

You can ask anything you want related to the tutorial or ask for clarification on any point that you do not understand, but with respect and in a constructive way.

If you're not sincerely interested, skip this thread.

Cheers!

Mikonos112021-02-16 17:59:54
 

Mikonos11

Active member
Credits
89CR
- The first thing is to get a good assortment of images. Your best friend is Goggle Pictures. You must deploy the tools and look for images, the bigger the better. I would put the search tool by size with the dimension: greater than 1024x678 pixels.

- The more images you have, the more action, the more variety within the same element. Example: Recreate Tie Fighters vs X-Wings battles.

- Make sure you have the largest possible image of those photos that you are going to select to crop. Sometimes it is annoying to spend a lot of time on an image and find a higher quality-size.

- You have to work at 150 dpi, this resolution is more than enough for the print to come out perfect.

- Always cut by hand. Never do it with Photoshop's self-cropping magic wand. If you are not going to invest time and patience, better not try it because you will end up with your tongue hanging out and swearing in Aramaic.

- Duplicate the original image and start by roughly cropping the figure because you will get very close with the magnifying glass to cut out. Do not do kilometers with the mouse in vain.

Scout Trooper with speeder bike - Star Wars.

SWS%20creando1.jpg


[font="verdana, tahoma, arial"]- With the fully zoom (almost always) and with the cropping tool, put at least 1 pixel inside the image to avoid white edges or others that make our element not integrate with any background. [/font]

SWS%20creando2.jpg


[font="verdana, tahoma, arial"]- Make small cuts. Don't do it all at once because sometimes the mouse stumbles and you can lose track of it. When I have a closed region, I press the "Delete" key and the area is cleaned. [/font]

SWS%20creando3.jpg


[font="verdana, tahoma, arial"]- Once the cut is finished, without forgetting interior spaces, we check it by putting a black background and we observe results.[/font]

SWS%20creando4.jpg


[font="verdana, tahoma, arial"]- If there is an edge lacking a better finish, we will take the hard erase tool at your discretion (I use it at 50%) and erase slightly until it is as good as possible. [/font]

SWS%20creando5.jpg


Scout and Speeder Bike Star Wars. Cleanned by Mikonos (1330x664 píxeles)
Scout%20and%20Speeder%20Bike%20Star%20Wars.%20Cleaned%20by%20Mikonos.png

Mikonos112021-07-01 09:23:40
 

Mikonos11

Active member
Credits
89CR
- We should avoid as much as possible using figures cut out by other users in "png" format, because you will never be as good as the ones we make by following this guide. Those users are generally looking to save time (a lot) and resort to various techniques, such as auto-cropping and selection refinement.

SWS%20creando6.jpg


[font="verdana, tahoma, arial"] When the figure and background are somewhat confused, a trick is to create a new layer of brightness and contrast, and subtract values from it so that the silhouette can be more outlined and know where to cut. [/font]

SWS%20creando7.jpg


Scout trooper - Star Wars. Cleanned by Mikonos.
Scout%20trooper%20-%20Star%20Wars.%20Cleanned%20by%20Mikonos.png
 

Mikonos11

Active member
Credits
89CR
[font="verdana, tahoma, arial"]- To cut the hair in some silhouettes we will have to adjust to it to a certain extent. If you see background between the bridges that tend to long hair, we will clean it. It is preferable to lose hair to show the background. We should not go crazy cleaning our hair because it would be a very heavy task. Here we cannot use the rule of putting a pixel inside the drawing. [/font]

SWS%20creando9.jpg


[font="verdana, tahoma, arial"]- We will design the smallest hair with the "Smudge tool" with one pixel thick and with a force of between 50% - 75%, dragging from inside the hair, in the periphery area, outwards and in the direction of the own hair, creating bows or straight lines, as appropriate. What we are doing is painting it and even improving it. [/font]

SWS%20creando10.jpg


Grand Moff Tarkin. Cleanned by Mikonos (628x1205 píxeles).
Grand%20Moff%20Tarkin.%20Cleaned%20by%20Mikonos.png


Mikonos112021-07-18 07:18:06
 

Mikonos11

Active member
Credits
89CR
[font="verdana, tahoma, arial"]- If you have to add special effects to your already silhouetted figures, it is preferable that you work these effects before and add them to your decoration later. It is convenient to create a "folder" with images and superimposed effects (careful!), and drag it, as if it were a single layer, to your work plane. [/font]

SWS%20creando11.jpg


[font="verdana, tahoma, arial"]- If there are elements that naturally should show total or partial transparency, you will have to cut out that element by extracting it to the main outline and then pasting it back in its place, removing opacity (making it transparent to a greater or lesser extent to reveal the background behind and complete the illusion of transparency or translucency). [/font]

SWS%20creando12.jpg


[font="verdana, tahoma, arial"]This is a scene from Star Wars Episode I, which I have quickly composed so that you can see how well the effects and transparencies are integrated. [/font]
SWS%20escena1.jpg
 

Mikonos11

Active member
Credits
89CR
- In complex cuts with blurred or complex backgrounds, where it is not possible to cut by hand without losing some relevant details, we can isolate using RGB automatic cropping: We remove the part that is easy to isolate by hand and leave the rest, the background We convert it to white (I recommend the "levels" tool and the white color eyedropper to convert everything), we go to the channel layer and mark on the RGB layer with the control key and the right mouse button at the same time, we invert selection, we copy over the original layer (not the one manipulated with a white background), we paste. We can continue to touch up this layer by hand so that it blends well with the part that we have cut by hand.

SWS%20creando13.jpg


Watto. Cleanned by Mikonos (1889x2323 píxeles).

Watto%20-%20Star%20War.%20Cleaned%20by%20Mikonos.png
 

Mikonos11

Active member
Credits
89CR
[font="verdana, tahoma, arial"]Here is the Pod Racer scene from Episode I of Star Wars, where you can check the cleaning work with Watto. [/font]
SWS%20escena2.png
 

Mikonos11

Active member
Credits
89CR
When you have well cut out´elements, we can create a scene from Star Wars very easy and almost without retouching.

Here a Endor Scene with scout troopers on Motojet and AT-ST Walker from Star Wars Episode VI. Mikonos.
SWS%20escena3.png


Mikonos112021-08-27 10:03:40
 

Mikonos11

Active member
Credits
89CR
- If you do not have photos of elements that you would like to see from Star Wars, you can always see toys, models, renderings and photorealistic paintings.

Star Wars scene with Jabba's barge "The Hutt", which is a painting. By Mikonos.

SWS%20escena5.png
 

Mikonos11

Active member
Credits
89CR
[font="verdana, tahoma, arial"]- It is interesting to use "lens flare" effects to enhance brightness and create other effects, such as ship engines. [/font]

Empire%20Star%20Destroyer.%20Cleaned%20by%20Mikonos.png


[font="verdana, tahoma, arial"]Millenium Falcon. Clean by Mykonos. In this case everything is manufactured, so both images are "png". [/font]
Millenium%20Falcon.%20Clean%20by%20Mikonos.png

Mikonos112021-09-09 23:36:13
 

Mikonos11

Active member
Credits
89CR
Different "lens flare" effects for spaceship engines build with blured color spots .

Star Wars scene_ Y-wings. Mikonos.
SWS%20escena8.png


Star Wars scene: Y-wings (2). Mikonos.
SWS%20escena9.png


Mikonos112021-09-24 00:45:04
 

Mikonos11

Active member
Credits
89CR
I'm cleaning up a lot of Star Wars stuff and I really want to play with it. : lol:: wub:

Star Wars scene: AT Driver and AT AT Walkers. By Mikonos.

SWS%20escena10.png


[font="verdana, tahoma, arial"]Both in the previous scene and in the one you see, I have used models for the characters. [/font]

Star Wars scene: Luke Skywalker Pilot Walkers retouched. By Mikonos.
SWS%20escena11.png
 

Mikonos11

Active member
Credits
89CR
[font="verdana, tahoma, arial"]- The "lens Flare" effects are a great resource and abundant on the web, they help to improve the integration of the images that we compose and will embellish the result. We usually find them on a black background. Cut them out using circles or oval shapes with smooth transitions and superimpose them on the desired image with the "Screen" layer effect in Photoshop (it makes the black disappear.[/font]

[font="verdana, tahoma, arial"]
[/font]

[font="verdana, tahoma, arial"]Mikonos lens flare´s collection for Star Wars arts. [/font]
lens%20flare%20samples.jpg
 

Mikonos11

Active member
Credits
89CR
I retouch with lens flare effects almost all ... and see how well they look:

Star Wars Scene: IG-88, Imperial prove, R2-D2 and C3PO retouched with lens flare effects.

SWS%20escena12.png


IG88 has a ton of head effects, including some little white lights. C3PO has the 3 little lights every eye. This modeling has taken me several days to clean it due to the large number of cables in the air.

Greetings
 

Mikonos11

Active member
Credits
89CR
I'm fine-tuning the issue of ship engines:

Star Wars Scene: X-Wing and Y-Wing engines seen from behind. By Mikonos.
Star%20Wars%20Ship%20Motors.png


I've added plasma noise to them. I think it is more realistic now.

Greetings!
 
Top