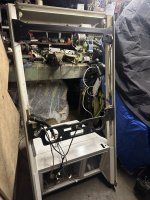
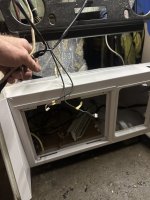
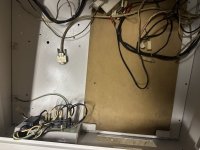
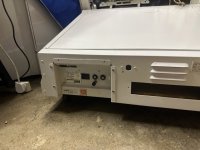
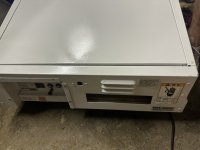
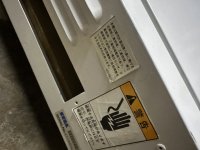
Any interest in a Group buy in wigan 3x noir?

eliotcole

Active member
Feedback
8 (100%)
Credits
1,092CR
Sure, but that connector I linked to literally is 32-pin which you push in and/or pull out ... but ... whatever works for you, bud!
Only looking for something that has a quick connect & disconnect of a cable circa awg 16

Not wago as too big ..
Wago dinrail looks like a great method ( push down on a spring button to let the cable in).

Wago din rail looks ok
But still to big
 

Retroman839

Senior Member
vacBacker
Feedback
13 (100%)
Credits
8,062CR
image.jpg
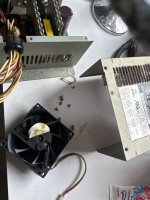
A drop of high grade mineral oil for the Naomi psu fan 😁 should help it run a bit more smoothly .( less loud )image.jpg
Using this because I have it for my nail guns .. but seeing machine oil is good
Or just replace fan with Noctua
 
Last edited:

jerryspaghetti

Active member
vacBacker
Feedback
35 (100%)
Credits
1,962CR
Just come across this. Guy's name is John. In January 2025 I purchased an MVS U5 of him on ebay. I made a thread about it. I heard nothing back from him at all. Text, email, ebay. Nothing. Eventually I got a refund off ebay. This is despite several people on here saying they got machines off him in the past. Was a real pain to deal with but they got their cabs. This week, almost 2 years after my failed purchase, John contacts me on ebay about the U4. Asking where it is as he is missing one machine. I tell him I never got the cab and it got cancelled so I have no idea where the U4 went. It was all very polite but very strange to have someone 20 months later ask about a failed ebay sale. He say's he has no idea what has gone on but is looking to track the machine down. It was all very bizarre. I don't think he is a scammer but proceed with a lot of care.


Sounds like John has got himself into a right pickle.

I think I can shed some light on this!

I initially bought one off him through ebay and went to collect it in person as I was up at the Arcade Club Bury for the Ukvac meet up in November 2024.

He had 4 of them in total in the warehouse there but not sure if one of those 4 was Stokers?

I told him I might be interested in another one but would let him know.

Then I called him a few weeks after and done a deal on a pair of them and Martin collected both for me.

I fixed one up for myself and was restoring the other 2 to sell on but got jaded by the process and sold them as projects to Mark at HOG last year.

Mark didn’t have the time to sort them so put them back up for sale a few months ago. He sold one to a guy on here and I bought the other one back off him, finished it all off and sold it to another forum member on here.

So I reckon the guy must’ve got confused as to how many he did or didn’t have which is maybe why the ebay listing got cancelled.
 

eliotcole

Active member
Feedback
8 (100%)
Credits
1,092CR
I mean ... I think that a NUC could have RearHUGE fans (weird that these Noctua 200mm fans are down on CFM compared to the spoilered fan table) on the external edges to cool the insides. Basically with the intent that larger fans placed on said case would vastly improve general air flow.

This would mean that some components may need no fan whatsoever if their heat-syncs were improved, or (at the very least) far more moderate fans.
Here's a table of data from (this page on) PC Explorers site, which could be a load of crap ... but ... eh ... here:
PC Fan Size Diameter (inches)Airflow (CFM)Noise (dBA)Power (W)RPM
40mm1.65 – 1020 – 300.5 – 14000 – 8000
80mm3.120 – 4025 – 351 – 22000 – 4000
92mm3.630 – 5020 – 301 – 31500 – 3000
120mm4.740 – 8015 – 252 – 41000 – 2000
140mm5.560 – 10010 – 203 – 5800 – 1500
180mm7.180 – 12010 – 154 – 6600 – 1000
200mm7.9100 – 1505 – 105 – 7400 – 800

I think (given the 'base unit' dimensions available) there's two options, and in both cases I would go for a 'positive pressure' setup to avoid further maintentance regarding the internal dust, etc ... I've avoided side exhausts / inflows as one can never be sure of available space there and NUCs are naturally raised.

See the below spoiler for what I though, but basically, any of the *easy* mods (panel replacements) would not be able to use anything over ostensiblymm at the rear, and realistically I'd stick to the same for placement on any replacement front door.

Below is what I'm thinking:
  1. Rear To Front - Two sets of fans:
    1. Rear - Replacement comms panel with as many 140mm fans as one can fit
    2. Front - Either a replacement front panel (easier and more functional) or venting top front section (retaining visible original nature/security) of the base:
      1. Panel - A replacement panel could house a couple of exhaust fans AND leave space for other mods
      2. Top - Making some venting holes in the roof of the front of the base unit would allow the mounting of fans of whatever size one likes
  2. Front To Rear - Theres a couple of options I see here ... I DID consider bottom to top but (whilst doable) would be a royal pain:
    1. Front - Here I think either replace the front panle, or venting the bottom of the base:
      1. Panel - Replacing the front panel would be an easy mod for as much input as possible with space for other mods
      2. Bottom Vent - More intensive work, but fans could go UNDER the base meaning that the internals don't need TOO much additional reconfiguring
    2. Rear - This would only be either a replacement comms panel or venting on the door with fans

I do like the idea of replacing the comms panel and front door (even with painted wood!) I mention in the spoiler would be a good idea, though. I thought most about the large front hatch ... which could leave space for additional mods:
  1. Subwoofer - Improve the cab's acoustics just a little with either a mounted sub, or the output *from* a sub that's more deeply embedded in the case
  2. Raspberry Pi Access and/or Monitor - Add a simple area to either access an in-site rPi system or even mount a usable monitor connected to that
  3. Cavity: Accellerator / Brake Cavity - Basically, plop in a cavity to plop feet through to reach some racing pedals
  4. Cavity: Controllers/Whatever - Similar, but simply as storage for control pads connected via Dreamcast/aaa method or other options
  5. Simple IO Sockets - Adding easy plug in IO access to plug in guns, rollers, etc, etc ...
I dunno ... I guess I'm just saying that by making a panel provides you options for other modifications that you might wish to make for ease of access.
 

nam9

Newbie
Feedback
2 (100%)
Credits
119CR
View attachment 66386
Holding test button down before booting and keeping it held down
..

Same result
Upon the could not read dips error
Blinking light imedeatly turns solidView attachment 66387

From AP

If it's anything like TTX2 you have to upgrade the firmware to 1.43 or later and boot with the test button held to change the JVS signal level. You only have to do this once. I wouldn't worry about trying to discover the FW version and just update to the latest.


Ok I’m on latest firmware 2.4 confirmed using the tool on the firmware site that tells you what firmware your running .

So I hold test button down on boot .


As soon as I get the could not read dips message the blinky turns solid


I have sussed out the mode test + service .. then hit test led blinky flashes once …. Your in mode 1
Press test again Led blinky flashes twice .,,,, your in mode 2. Etc.. etc ..

But that don’t help me to get past the error that my ttx2 aint seeing this Iona jvs to usb.
Is yours a stock TTX2? Had issues like this when I makes a clone version. Was an issue with power to the JVS card in the TTX2 itself..
 

Retroman839

Senior Member
vacBacker
Feedback
13 (100%)
Credits
8,062CR
Is yours a stock TTX2? Had issues like this when I makes a clone version. Was an issue with power to the JVS card in the TTX2 itself..
Thnaks for help ..
I’m now being told by AI
Because my led turns solid ( no longer blinking )
It has made the hand shake . - which is good 😁.

But that it’s seeing my io bit unable
To read the dips .. er ….. you don’t say ..

So it’s suggesting I go back into the firmware upgrade page and set my io as
Declare it as a namco jyu compatible device against the jvs query - turn this option to -ON


Th explanation is because the taito is seeing my io as sega device ?

Well it’s seeing my
Sega jvs to jamma I have just rigged up
IMG_0665.jpeg

But unfortunately it’s still not passing on the games I want to play
So..
I’m now thinking That this niko multi
Inside each game files

Jvs options Taito fast io - yes
Some are Jvs

And I need to connect this HDD up to my computer go into each indervidual
.ini config folder
And look for the jvs type…


As for the Iona ..
I will try what’s been mentioned by AI

Also I ordered another that I think is the latest revision …
I will persevere with it ..
As I want it and not a massive sega io 🤣image.jpgIMG_0666.jpeg
And I’m sure my pcb is legit got it early when I came out from AP
Dj sheep ..
And this papper work came with it
 
Last edited:

Retroman839

Senior Member
vacBacker
Feedback
13 (100%)
Credits
8,062CR
I like simple ..
Simples good


I don’t want 6 diffrent mappings

I only want 1 to work ..
So hopefully I can do that
I will go into the settings on the upgrade page and try to get settings correct so it works .


Scrap that !!!
It was connectors ..

IMG_0669.jpeg

So far though super street fighter is in Chinese
IMG_0668.jpeg
 
Last edited:

Retroman839

Senior Member
vacBacker
Feedback
13 (100%)
Credits
8,062CR
So all the .config files that are set up as Xbox pad work with the namco io

All the games that the .config file says
Game type = jvs

Don’t work with namco io.
Or sega jvs to jamma
?image.jpg
Street fighter 4. Has jvs error on boot
 

Retroman839

Senior Member
vacBacker
Feedback
13 (100%)
Credits
8,062CR
Don't any of your Naomi cabs have JVS to try on them ?
I have other jvs sega card I couls
Try yes ..
But sega jvs to jamma is jvs
And it does work like the Naomi jvs card does work.

But not with any of the games that have
Game type =jvs

I will try another of my jvs cards
Sega jvs non jamma type 3

are there 2 diffrent taito type x2 jvs pcie cards for the typex ?
 

Retroman839

Senior Member
vacBacker
Feedback
13 (100%)
Credits
8,062CR
It knows the jvs to jamma was connected ?
And niko multi is well known for its multi functionality allowing jvs to be functional with the taito fast io games

So why is mine not working 🤔
IMG_0670.jpeg

Same games that did not work with namco io
Do not work with sega io
 

Retroman839

Senior Member
vacBacker
Feedback
13 (100%)
Credits
8,062CR
Don't any of your Naomi cabs have JVS to try on them ?
Yes, your Sega I/O board (part number 838-13683D) is completely compatible with the Niko Multi.


[1, 2]
The 838-13683 series represents the Sega JVS-to-JAMMA Revision 1 (v1)hardware family. The "D" at the end simply denotes a minor manufacturing PCB revision suffix, but functionally, it operates identically to the widely used 838-13683-93 and 838-13683-02 boards. This specific model is highly regarded in the community and is actually the recommended Sega JVS I/O for running the Niko Multi on Taito Type X setups
 

Retroman839

Senior Member
vacBacker
Feedback
13 (100%)
Credits
8,062CR
IMG_0691.jpegIMG_0692.jpegIMG_0691.jpeg

2 x good sega type 3 io from my working Naomi’s and ……
Same result as
Namoi io
And sega jvs to jamma


It has to be the configuration of the
Game files how this is set
Up for the jvs ?


The problem is
I’m supposed to
  1. Locate and launch JConfig.exe.
  2. Look for the Card/IO section or gametype dropdown.
  3. Switch it from fastio (or auto) explicitly to jvs. This tells the game's startup hook to stop searching for the missing proprietary Fast I/O PCB and initialize standard JVS serial tracking instead.


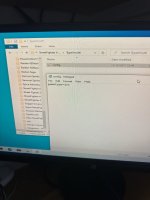
So I hook hdd back up to my pc &
Jconfig.exe is not present in th game folder ?


My looms have the coin counter spoof resistors also
IMG_0689.jpeg
 
Last edited:

Retroman839

Senior Member
vacBacker
Feedback
13 (100%)
Credits
8,062CR
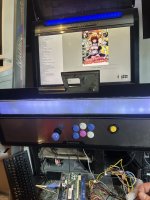
Pushing on with new net city
IMG_0726.jpeg
Cleaned , sanded and sprayed the black foot stoppers ..
Then a light librication for the looking nut ,
IMG_0728.jpeg
Legs / monitor frame returned to the base, wheels on , cables routed .IMG_0729.jpegIMG_0730.jpegIMG_0731.jpegIMG_0732.jpeg
Still need to clean the cables IMG_0733.jpegIMG_0735.jpegIMG_0737.jpegIMG_0736.jpeg
Stickers need a bit more glue ..
Or a repro set is most likely going to happen
 
Top