Phils Arcade Thread - Workshop build

Phils Arcade

Senior Member
vacBacker
Feedback
10 (100%)
Credits
1,415CR
One of the nice things about working from home is, once the work work has finished, there's no travelling to get home. You're instantly there, lovely.

Today was a nice warm, and dry, again, evening, and with darkness getting later and later, was able to hit the workshop again, along with the wife.

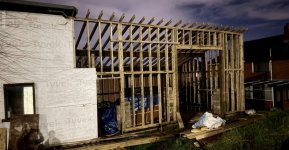
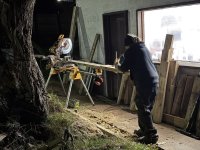
Rogan, the wife and myself managed to hoist the main cross beam up, to be installed as the cross piece in the main doorway along with the framing just above that. Whilst I was beavering away doing that, the wife was finishing off the rafters so they could go up next. The past few days have been mad, but well worth it.

Once done for the day, headed for a Chinese and cold beer, delish

Looking forward to getting the sides boarded out now, and then the roof goes on, yay!
Bronagh01.jpeg

Framing02.jpeg
 

Phils Arcade

Senior Member
vacBacker
Feedback
10 (100%)
Credits
1,415CR
So another weekend has come and almost gone. The weather has been so, so, but managed to get a little further on with the build.

Framing04.jpeg


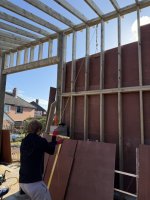
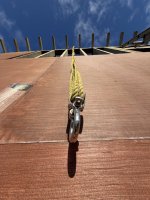
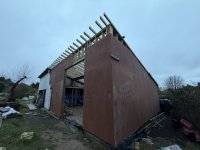
The first level of boarding out is easy enough. Lift up to the marked line, set with the laser level, leaving a small air gap at the bottom, between the dwarf block wall and the plywood sheets. The second level is even easier, as it happily sits on top of the first level, and with being 8 foot boards, span a nice distance. The third level can be the pain, right. Not really, as I've devised a block and tackle pulley system that allows the boards to be lifted up with ease.


PullySystem01.jpeg PullySystem02.jpeg

The block is attached to the upper portion of the top plate, and down to the sheet to be lifted. By threading the rope through multiple pulleys, the system multiplies the force applied, reducing the necessary pulling force to a fraction of the actual weight. This way Rogan was able to lift the boards by himself, while I aligned and fixed them into position.

So this allowed the front and sides to be lifted within a short space of time.

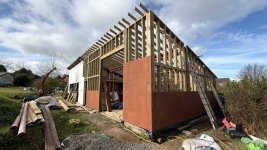
Framing05.jpeg


As you can see, just a small portion of the front and side still to finish off. You can start to see the size of the loading/unloading door for the van.

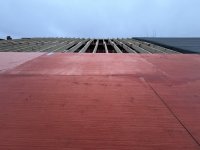
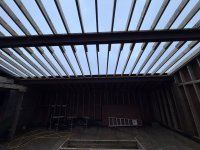
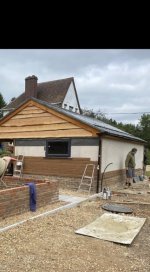
As it's been fairly dry today we thought we would try and get at least some of the roof started. Typical, once we started it rained. Stoped due to the rain and the rain stopped too, and so the dance went on. In the end we just braved it and managed to board out the first two rows of the roof. This still needs the roofing mineral felt and adhesive to be done, but that requires a dry day.

Roof01.jpeg Workshop01.jpeg


Hopefully with the brighter nights coming in, we can get this done over the next week and weekend.
 

Phils Arcade

Senior Member
vacBacker
Feedback
10 (100%)
Credits
1,415CR
Looking great mate nearly wrapped up.
Will you wrapp it all in breathable membrane
Or bitumen wind stop papper ?

The place will be wrapped in Tyvek house wrap, same as the other side.
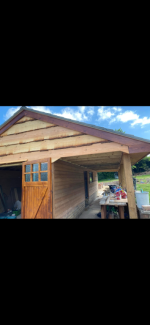
Once complete the back and sides will have an air gap between that and the log effect wooden cladding. The front, hopefully, will be live edge planks.
 

Retroman839

Senior Member
vacBacker
Feedback
12 (100%)
Credits
7,366CR
👍..
Yeh I have been using live edge on my
Projects, very nice.
Douglas fur ..IMG_6098.pngIMG_6100.jpegIMG_6101.jpeg
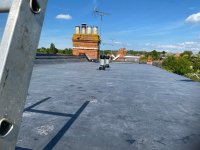
Massive 12m wide new flat roof dormer loft convertions job I did last year .. one piece rubber ..


IMG_6099.jpeg
Me and my brother ..
10 years on site for contractors.
15 years self on our own.
 
Last edited:

Phils Arcade

Senior Member
vacBacker
Feedback
10 (100%)
Credits
1,415CR
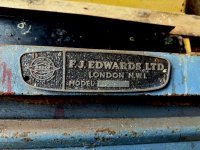
First piece of equipment arrived yesterday for the workshop.

Bought this off a fairly local guy who was selling it to get a larger one. This is a metal shear for a number of repo projects I've lined up.
Needs a bit of a clean, split pins replaced, and cutting blade tidied up, but seems to be in decent shape otherwise.

Working on getting the rest of the roof boarded out tonight and get wood sealer put on. Hopefully, if it stays dry tomorrow can start on the roofing mineral felt.

Screenshot 2026-02-20 at 14.43.19.png Metal Shear01.jpeg
 
Last edited:

Retroman839

Senior Member
vacBacker
Feedback
12 (100%)
Credits
7,366CR
That looks really well. Is the rubber membrane hard to put down?
Nope…
Like a pva glue .. ( not a pva but like it )

Paint roller it on ..
Turns blue and translucent ( tacky ) then you can lay rubber ..
First lay complete sheet of rubber over your osb or ply roof ..

Then fold at increments of what you can handle ..

Less likely to have any trapped rinckles if you fold it back nice
In like 2m folds ..
Go to half way stop ,

Glue that half in 2m sections fold back when glue is blue ..
Pulling any rinckles out ..

You need your bardge boards on.
And then a roof batten
25x50 all way round for rubber roof trims ..

The 25mm gives the space for your Drip ! Into guttering 👍
 
Last edited:

Phils Arcade

Senior Member
vacBacker
Feedback
10 (100%)
Credits
1,415CR
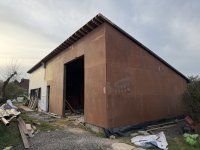
Well, we've just about got another weekend over us, and I'm glad to say, good progress has been made.

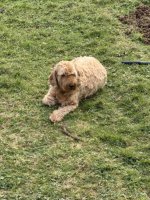
All the boarding out, walls and roof, has been completed,.Great fun trying to find ingenious ideas to make it easier getting boards up onto the roof, especially as it getting higher as you move towards the front. As you can see, the supervisor had decided he'd seen enough and went for a relaxing lie down, lol.

IMG_0449 Large.jpeg IMG_0444 Large.jpeg


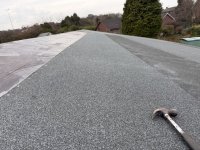
We also managed to, almost, get the roofing adhesive and mineral felt put down. Just one more roll to go, so maybe, just maybe, get that done Monday.

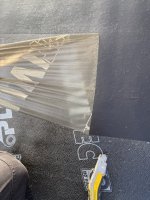
The most annoying part of doing the mineral felt was trying to get the backing plastic off the mineral felt itself. Simple idea, just grab one corner and pull. It should come right off. Ahhhh, NO!

Every little nick and mark causes the protection layer to split, and you then have to spend time picking at the bits still stuck to the mineral felt, ugh! We did eventually get into a process of splitting it into thirds and found pulling it at an angle of roughly 45 degrees.

IMG_0443 Large.jpeg IMG_0448 Large.jpeg

Next up will be getting it wrapped, getting the door frames made as well as the door, including the large loading bay doors. Fun times.
 

Phils Arcade

Senior Member
vacBacker
Feedback
10 (100%)
Credits
1,415CR
Nice size ,
Big door

What kind of door will it be phil ?

Wanted something biggish so I can have a construction dirty area, and a bit of a clean(er) room for electronics servicing, design, etc...

The roof area was 18 x 9 metres, so fun putting that down, but almost done. If it stays dry today hopefully the facia board and final layer can go on.

The door was designed to be big enough to allow me to reverse a Luton style van in so unloading wouldn't be out in the rain, knowing the weather we get over here, lol.

Was going to go for a roller door, but the cost for that size and weight was a little off-putting. Ended up ordering some heavy duty hinges, so standard swing opening with half width. Will fold back nicely against the main wall and not be in the way.
 
Last edited:
Top