Blimey over a year ago I was doing this. been quite busy working on them again as years ago I bought some of the later Immersion FFB I/O boards from member here or may have been J+ and it was about time I got to work on them and get them fitted
I originally used Act Labs wheels stripped down for wheel/Pedal setup and was going down amplifier for voltage to power these motors but the all in one Immersion is perfect setup when I have the matching wheel mechs, another reason for those was I was thinking I could also Run a Dreamcast in the cab to play the driving games on that but with emulators and pc's good enough now we can play them all
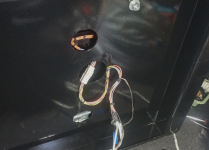
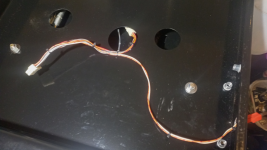
As I'd fitted everything to the back of the dash and now really needed to fit the new board in machine base so time remove all from dash and start again and do everything twice as it's twin cab as other half loves driving games also, new wiring as it wasn't best job before, bits of wires joined everywhere, this time using more Amp Connectors and sega wiring with matching colour all way through, can use pin from connector to remove the pins/plugs from them and solder wires to them so look neat, got a box of sega wiring so nothing to buy apart from one 4 pin connector used on the shifters which i'd only got one, wasn't joking I'm reusing all the cable ties also as no need to waste anything
Speaker system has 5.1 sound so I added centre speakers where the older cabs had dash tweeters, not sure if games are really going to use them but kept them and wired back up


I originally used Act Labs wheels stripped down for wheel/Pedal setup and was going down amplifier for voltage to power these motors but the all in one Immersion is perfect setup when I have the matching wheel mechs, another reason for those was I was thinking I could also Run a Dreamcast in the cab to play the driving games on that but with emulators and pc's good enough now we can play them all
As I'd fitted everything to the back of the dash and now really needed to fit the new board in machine base so time remove all from dash and start again and do everything twice as it's twin cab as other half loves driving games also, new wiring as it wasn't best job before, bits of wires joined everywhere, this time using more Amp Connectors and sega wiring with matching colour all way through, can use pin from connector to remove the pins/plugs from them and solder wires to them so look neat, got a box of sega wiring so nothing to buy apart from one 4 pin connector used on the shifters which i'd only got one, wasn't joking I'm reusing all the cable ties also as no need to waste anything
Speaker system has 5.1 sound so I added centre speakers where the older cabs had dash tweeters, not sure if games are really going to use them but kept them and wired back up


")


