You are using an out of date browser. It may not display this or other websites correctly.
You should upgrade or use an alternative browser.
You should upgrade or use an alternative browser.
Today I did this to my cab...
- Thread starter smarty
- Start date
Cheers mate, One thing I learned and would do next time is to try and not go over the same bit of glue with more glue when spreading - its hard to avoid doing that though because of the nature of the glue, also might try warming the glue up a bit to soften it more.
Thanks Smarty, it's not as grey looking in real life, was late in the day. I'll put up a thread on this when its finished if people are interested.
niknak2015-05-27 15:35:15
Thanks Smarty, it's not as grey looking in real life, was late in the day. I'll put up a thread on this when its finished if people are interested.
niknak2015-05-27 15:35:15
Alpha1 said:Took the marquee and marquee brackets off the Puckman as I start to dissect it!
That all you have done


That's looking

philiphunter
Newbie
- Credits
- 11CR
Wow, that looks like a new cab.
Tonight I capped the monitor in my Super Breakout cab. Image now looks great and rock solid!

Only downer is that one of the diodes connected to the focus section broke when I stared at it too long! very fragile... need to fine some replacements.


smarty2015-09-19 21:38:00
Only downer is that one of the diodes connected to the focus section broke when I stared at it too long! very fragile... need to fine some replacements.
smarty2015-09-19 21:38:00
This evening I started making adapter cables to run an Outrun board in a Power Drift cab...I'm making new cables from the backplane connector so nothing in the cab needs to be rewired. Tonight I made the audio and video cables, the rest will come in the following weeks.


Mart I'd be very interested in the details of this mate, like where to get the connectors etc..., so I can run my outrun board in my power drift cab.
Hurray Banana2015-09-19 22:16:39
Hurray Banana2015-09-19 22:16:39
Sure thing, once it's complete and working I will document the wiring for the new adapter cables and what connectors are required.

My PD cab is in great condition but the board has bad customs and they just don't seem to come for sale working, so this has to be the next best thing for the cab instead of having no game in it.
My PD cab is in great condition but the board has bad customs and they just don't seem to come for sale working, so this has to be the next best thing for the cab instead of having no game in it.
smarty said:Sure thing, once it's complete and working I will document the wiring for the new adapter cables and what connectors are required.
My PD cab is in great condition but the board has bad customs and they just don't seem to come for sale working, so this has to be the next best thing for the cab instead of having no game in it.
That would be great. I agree with the rarity, don't think I've ever seen a board for sale, a couple of cabs but that's about it. I bought mine from Luke wells years ago, and I think he got a working machine by dismantling two non workers.
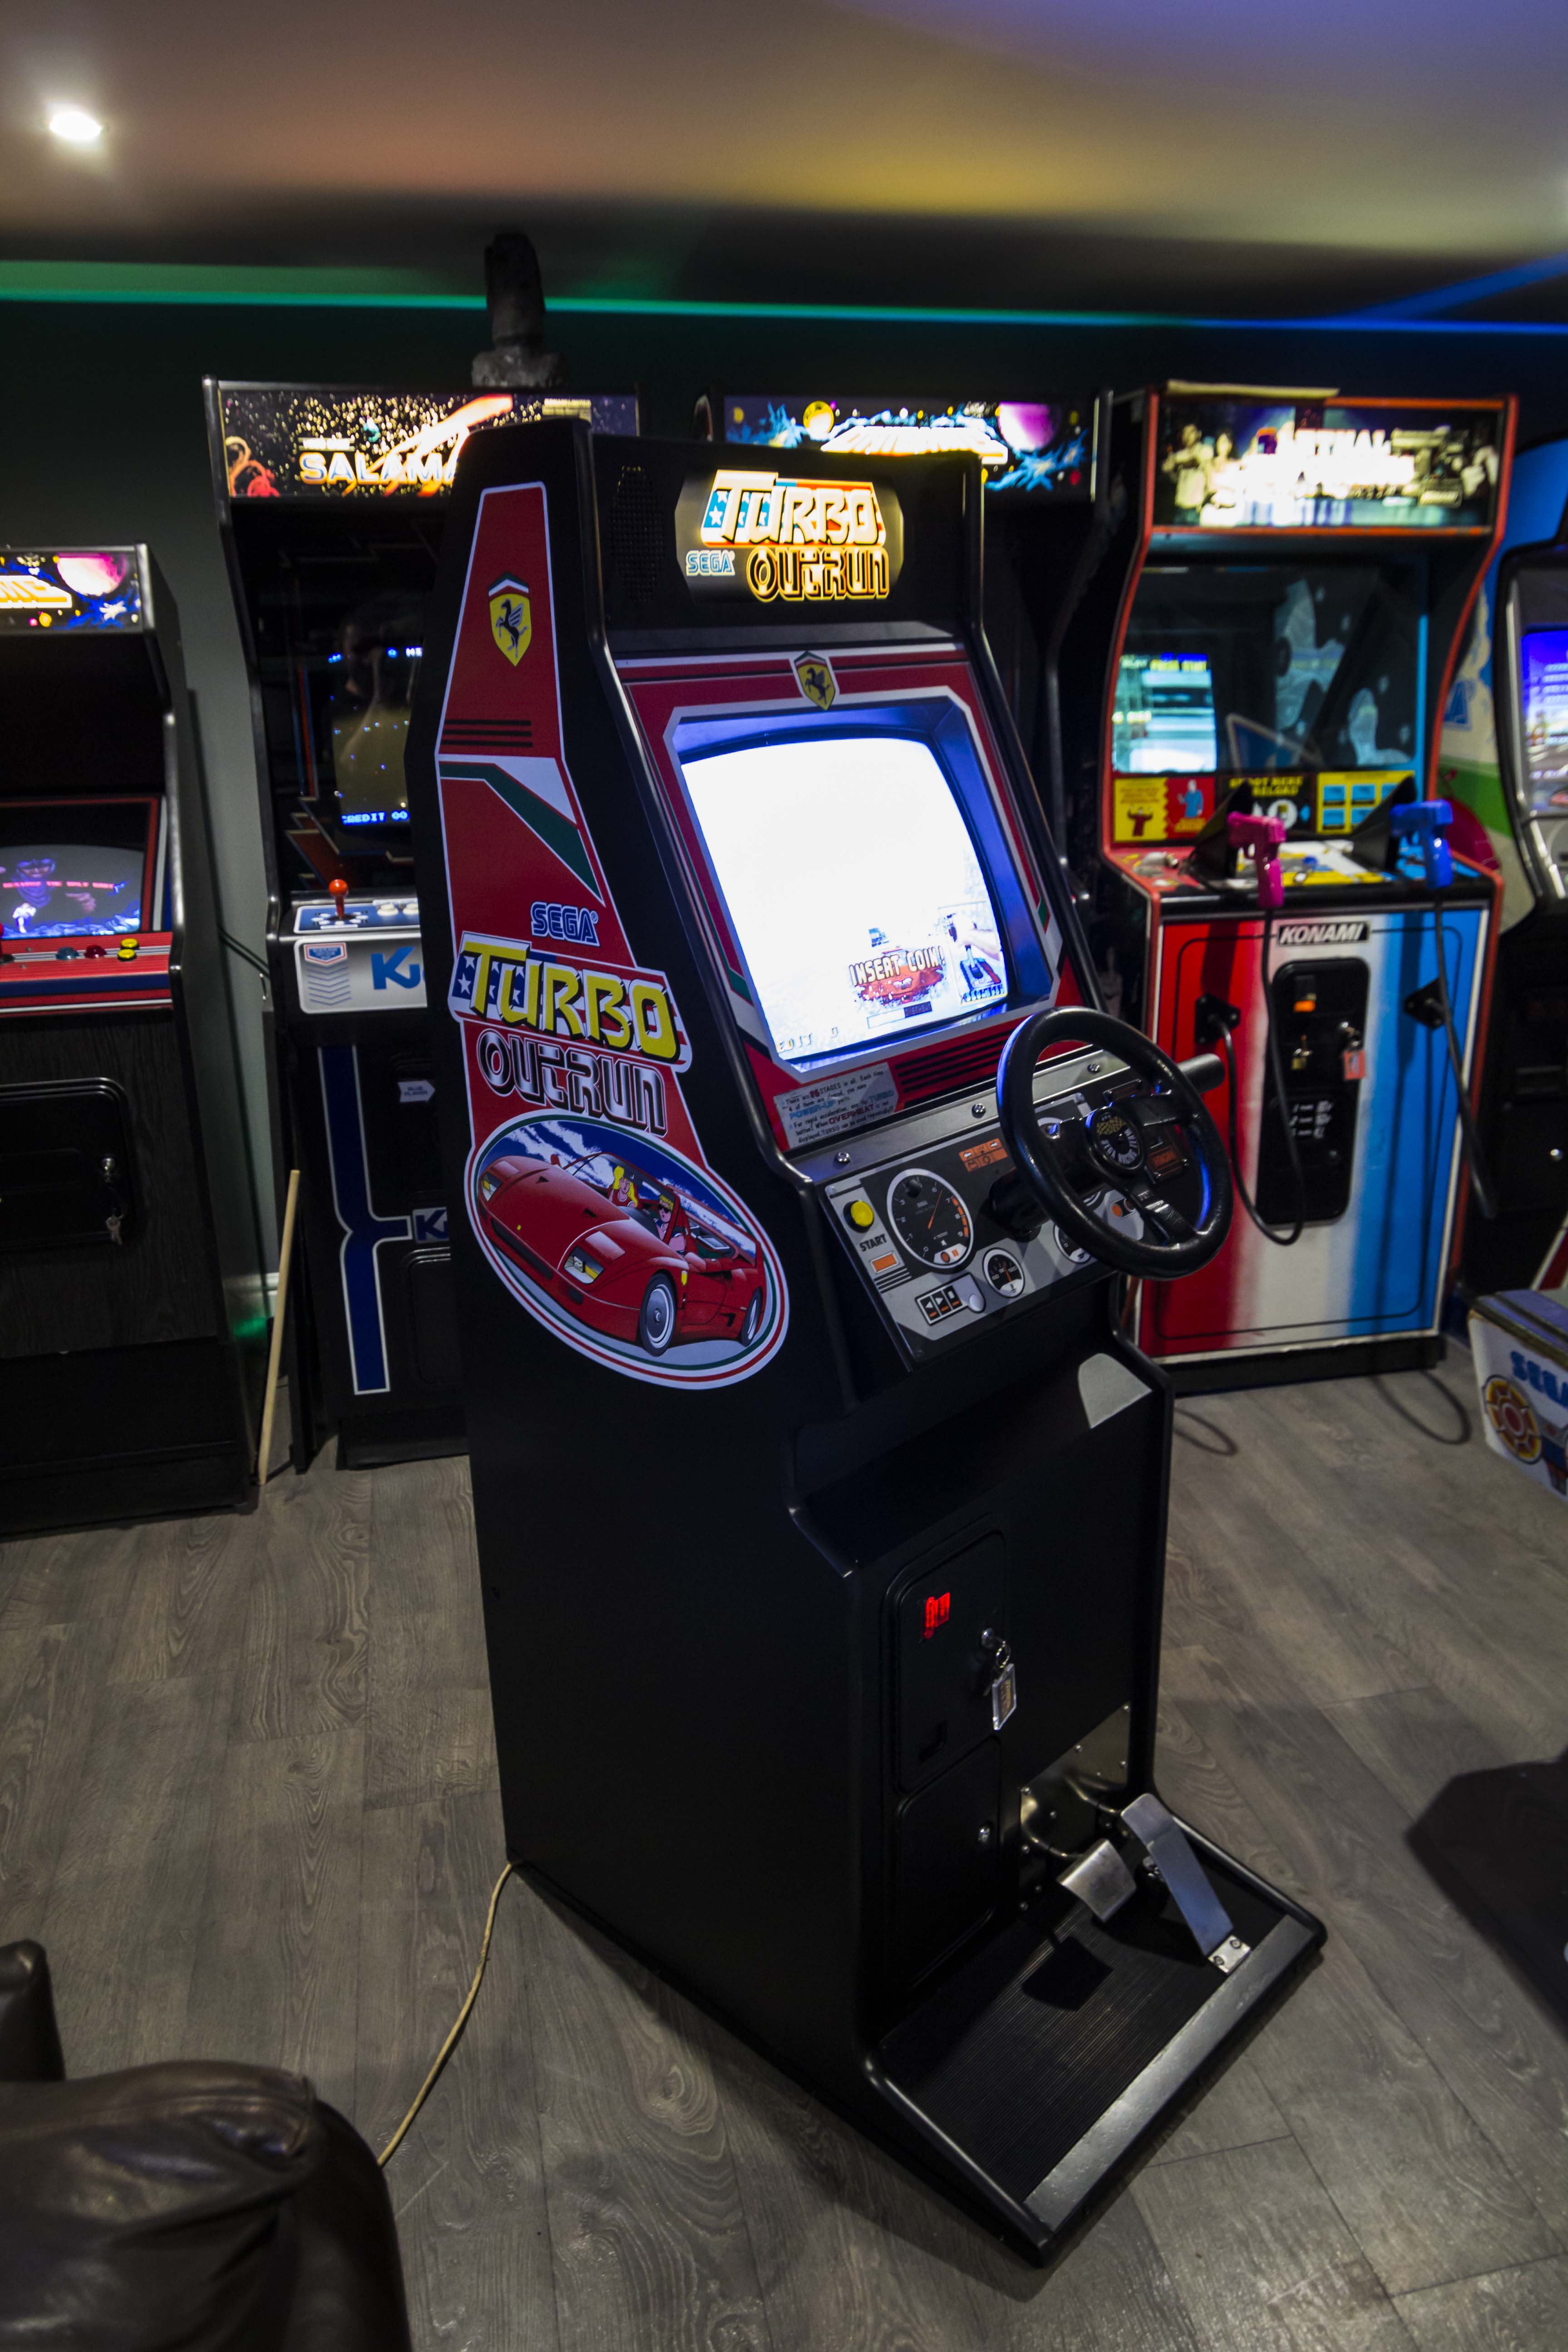
Only small things but today I fitted a repro Ferrari emblem to my Power Drift Steering Wheel, I changed the start button to a green one to make it more Outrun like..

I also cobbled together a Topper using the course map, I had some spare acrylic which I roughly cut to the shape of the sticker, once the sticker was applied I sanded the acrylic to the edges which worked nicely, I used some sticky foam backed trunking to stick the topper to, its then held in place to the cab by fitting the trunking under one of the screws for the marquee holder.

I plan to get a the marquee and screen bezel replaced with something a little more Outrunish in the future.
Cheers, Mart.
I also cobbled together a Topper using the course map, I had some spare acrylic which I roughly cut to the shape of the sticker, once the sticker was applied I sanded the acrylic to the edges which worked nicely, I used some sticky foam backed trunking to stick the topper to, its then held in place to the cab by fitting the trunking under one of the screws for the marquee holder.
I plan to get a the marquee and screen bezel replaced with something a little more Outrunish in the future.
Cheers, Mart.
cparsonsuk
Active member
- Credits
- 205CR
Nice updates! Although I'm still hoping to one day play Power Drift in this cab!
cNp
cNp
Looks good
Is out run gonna be in at your meet Martin?
Is out run gonna be in at your meet Martin?
Oh no. I didn't realise you didn't have a worker in the machine

Had a couple of days off from work, unfortunately I've had the flu so haven't ventured out.....luckily that gave me some free time to do a bit of tinkering.
Yesterday I moved the F355 cab into the house, and today I applied some artwork I acquired at a mini raid a while back. The artwork was in slightly rough shape but I'm happy with the outcome considering how many creases and rips it had.
I used Muddy's washing up liquid method to make life a bit easier. I had to use a stanley knife to scrape bits off the sticky side that were causing air bubbles, then I used a hairdryer to reactivate the stickiness. The RH side was in the worst condition, a little bit of the top section of the art had been torn off and the top edge was a bit cracked and had no stickiness where the backing had been removed.
The cab looks a lot better now though but still not as nice as Gary's F355/2 twin though.

Artwork before applying:

After applying:


Yesterday I moved the F355 cab into the house, and today I applied some artwork I acquired at a mini raid a while back. The artwork was in slightly rough shape but I'm happy with the outcome considering how many creases and rips it had.
I used Muddy's washing up liquid method to make life a bit easier. I had to use a stanley knife to scrape bits off the sticky side that were causing air bubbles, then I used a hairdryer to reactivate the stickiness. The RH side was in the worst condition, a little bit of the top section of the art had been torn off and the top edge was a bit cracked and had no stickiness where the backing had been removed.
The cab looks a lot better now though but still not as nice as Gary's F355/2 twin though.
Artwork before applying:
After applying: